
How to Remove Shadow from Picture: Beginner Friendly Guide
- Mark Mendoza
- August 30, 2026
- Tags: background editing, photo editing service, product photo editing, shadow removal service
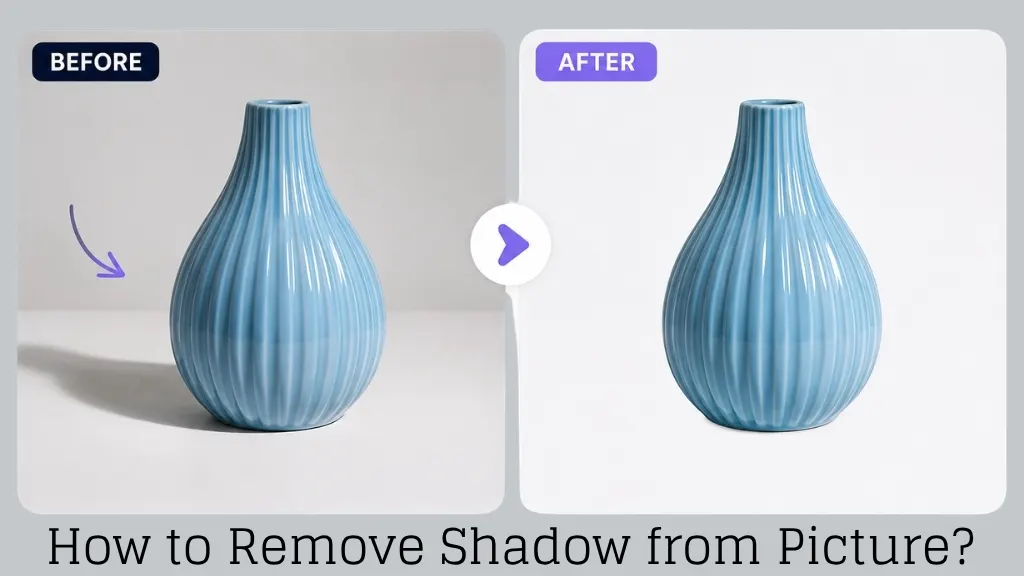
Unwanted shadows become visible when taking photos and the image looks messy due to lighting situations that have appeared. Especially by Product Photography & eCommerce Images, this issue is very common. This is the reason why many photographers, sellers as well as content creators wonder how to remove shadow from picture. A badly-handled shadow can ruin an otherwise-edit-worthy photo and decrease potential customer trust.
In this post, we guide you step by step on how to remove shadows from a picture, which tools to utilize as well as why a lot of companies prefer turning for assistance from an expert photo editing solution.
Why Shadows Are a Problem in Photos
When a shadow is present, the main product or subject of the photo doesn’t stand out properly. Without knowing how to remove shadow from picture, you may run into these issues:
- The background looks messy
- The product’s true color and shape become hard to see
- Products look unprofessional on eCommerce sites
- Customers get confused by the image
What You Need to Know Before Removing a Shadow
Before removing a shadow, there are a few things to keep in mind so the final result looks natural.
- Understand the direction of light: Knowing where the shadow is coming from makes editing much easier.
- Use a high-resolution image: Editing a low-resolution photo can lead to poor results.
- Notice the background color: Removing shadows is easier on a white or solid-colored background.
- Preserve the product’s real detail: Make sure the texture of the product isn’t lost while removing the shadow.
Step-by-Step Process to Remove Shadow from a Picture
Now let’s get to the main part — how to remove a shadow from a picture step by step.
Step 1: Study the Image Carefully
First, look at which part of the image has the shadow and how dark it is. This will tell you how much editing is needed.
Step 2: Use a Selection Tool
In Photoshop or any editing software, use the Lasso Tool or Pen Tool to select the shadow area separately.
Step 3: Adjust Brightness and Levels
Increase the brightness, contrast, and levels of the selected area to lighten the shadow until it blends with the background.
Step 4: Use Clone Stamp or Healing Brush
If the shadow is very dark, use the Clone Stamp or Healing Brush tool to copy the surrounding background and place it over the shadow area.
Step 5: Do a Final Touch-Up
Review the entire image once more to make sure the edited area doesn’t look mismatched with the rest of the photo, then export it.
Popular Tools for Removing Shadows from Pictures
Several software options are available for removing shadows. A few popular ones are:
- Adobe Photoshop – The most powerful tool for professional-level shadow removal.
- Canva – Popular among beginners for simple shadow editing.
- Remove.bg – Used for quick background and shadow removal.
- Lightroom – A great option for adjusting tone and shadows in an image.
A Quick Example to Understand Better
Let’s say you took a product photo of a shoe, but a dark shadow underneath it is ruining the overall quality of the image. A regular editor might just increase the brightness, leaving a faint mark instead of removing the shadow completely. But a professional edit would include:
- Precisely selecting and isolating the shadow area
- Using the Clone Stamp tool to match the background color and erase the shadow
- Keeping the shoe’s real texture and detail intact
- Converting the whole image into a clean background suitable for eCommerce
This is exactly the type of precise work we do every day at Clipping Creations India.
Why You Should Consider Professional Help Instead of DIY
Many people try removing shadows on their own but can’t get rid of them completely, because it requires technical skills like accurate selection, color matching, and retouching. This is where an experienced image editing team becomes valuable.
At Clipping Creations India, we have been providing image editing services for the past 12 years. Our team is skilled in shadow removal, background removal, clipping path, photo retouching, color correction, and every other type of image editing work. When it comes to shadow removal, we offer:
- Fast delivery
- The most affordable pricing
- 24/7 support
- 100% quality on every project
- Free trial and free quote
If you regularly need shadows removed from product photos, or any other service like background removal or ghost mannequin editing, you can get a free trial from our website clippingcreationsindia.com.
Common Mistakes to Avoid While Removing Shadows
- Editing too quickly and leaving marks behind
- Increasing brightness too much, which ruins the product’s real color
- Making an inaccurate selection, causing the edited area to look mismatched
- Exporting the image without a final check
Avoiding these mistakes will naturally improve the quality of your photos.
Conclusion
By now, you should have a clear idea of how to remove shadow from picture — it’s not just about increasing brightness, but a mix of proper selection, color matching, and retouching skills. You can try it yourself, or if you want to save time and get professional-quality results, you can rely on an experienced image editing team like ours. Clipping Creations India brings 12 years of experience to help you, all at a very affordable price.
Get in touch today for a free trial and see how a professional shadow removal can take your product photos to the next level.
FAQ's
Yes, apps like Snapseed or Lightroom Mobile can remove light shadows, but complex shadows usually need professional editing.
No, simple tools like Canva or Remove.bg can also remove light shadows. However, expert editing gives a more precise result.
If edited correctly, the product’s texture and detail remain intact. This is exactly why it’s a good idea to get help from a professional editing team.
A professional team handles accurate selection, color matching, and retouching precisely, which saves time and improves image quality.