
How to Invert a Selection in Photoshop: A Simple Step-by-Step Guide
- September 9, 2026
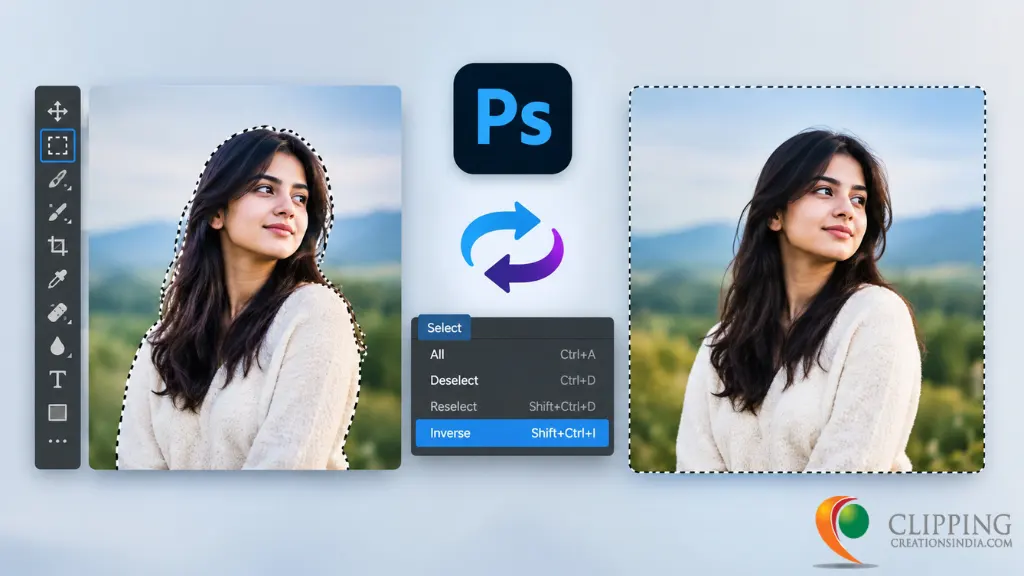
Knowing how to invert a selection in Photoshop should be one of the first things you learn when editing photos, as it will save you significant time. This means that rather than having to manually select the background, you can just select what it was first and reverse the selection with a command.
This is particularly useful when you want to remove a background, overlay with another color of your choice, blur everything except for the primary subject or any other adjustment surrounding an object.
Say you have clicked on an individual from a photograph. Nevertheless, you do not need to re-edit the individual. The whole background of coarse you want to edit the so. You can also go to Select and select Background, but that might be time-consuming! But Photoshop has a faster option available as well: invert selection
In this guide, you will learn how to invert a selection in Photoshop, which keyboard shortcuts to use, where the command can be found and how this works out in terms of real world photo editing.
What is Invert selection?
Invert Selection is a Photoshop option that reverses your current selection, whatever you selected. The area that you selected becomes unselected; rather, everything outside it becomes selected.
Think it; if you select a person and after that you invert the selection, it will select the background. This makes it easier to edit, remove, blur, or change the background. You can use this feature by going to Select > Inverse at the top bar in Photoshop.
Why You Need to Invert a Selection
Sometimes selecting a single object is easy, but selecting everything around it is not. Take a product photo on a plain white background. If the product has a complex shape, selecting the background directly can take forever and rarely comes out clean.
But if you select the product first and then invert the selection, the background gets selected automatically. This makes the whole process faster and far more precise. If after reading this blog you are still unable to do it and need professional image editing, contact us.
How to Invert a Selection in Photoshop
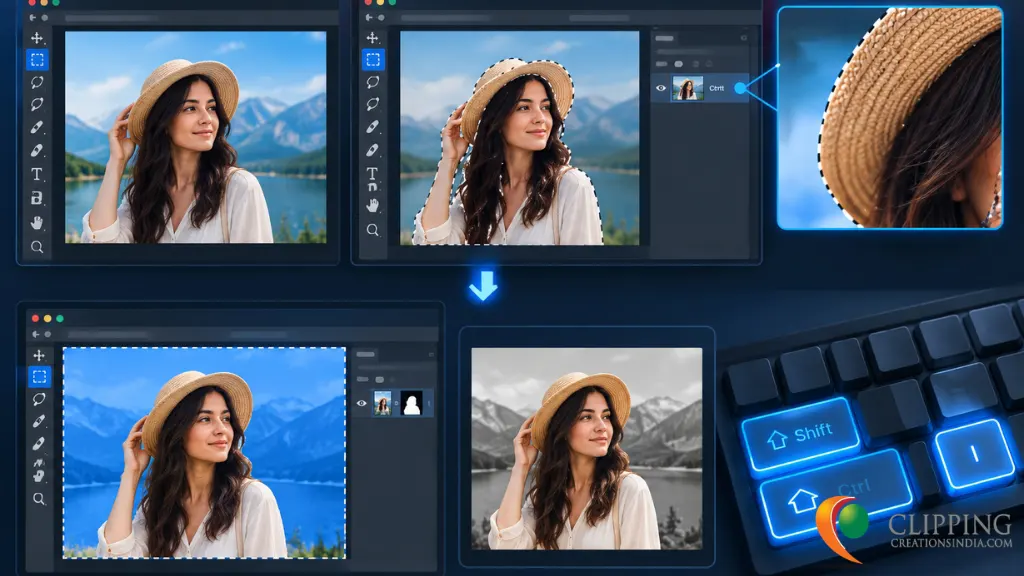
The easiest way to learn how to invert a selection in Photoshop is to first create a selection.
Follow these steps.
Step 1: Open Your Image in Photoshop
Open Photoshop and load the image you want to edit.
Go to:
File > Open
Then choose your image.
You can use almost any image for this process. For example, you might have a product photo with a white background or a portrait with a busy background.
Step 2: Select the Object You Want to Keep
Choose one of Photoshop’s selection tools.
Depending on your image, you can use:
- Object Selection Tool
- Quick Selection Tool
- Magic Wand Tool
- Lasso Tool
- Select Subject
For many images, Select Subject is a quick starting point.
Go to:
Select > Subject
Photoshop will try to identify and select the main subject in your image.
For example, if you have a photo of a person standing in front of a building, Photoshop may select the person automatically.
Step 3: Check Your Selection
After creating the selection, you will see moving dotted lines around the selected area. These are often called “marching ants.” Take a moment to check whether Photoshop selected the correct area.
Sometimes the selection may include unwanted parts of the background. In other cases, small areas of the object may not be selected. You can fix the selection before inverting it. A clean selection gives you better results later.
Step 4: Invert the Selection
Now comes the main step.
To invert your selection, go to:
Select > Inverse
Photoshop will immediately reverse the selection. The object that was selected before will no longer be selected. Everything around that object will now become selected. This is the basic process of how to invert a selection in Photoshop.
Photoshop Invert Selection Shortcut
You can also invert a selection without opening the menu.
Windows Shortcut
Press:
Shift + Ctrl + I
Mac Shortcut
Press:
Shift + Command + I
This is one of the most useful shortcuts for people who edit images regularly.
For example, if you are editing product images every day, repeatedly opening the Select menu can slow down your work. Using the shortcut lets you reverse the selection almost instantly.
How to Invert a Selection After Using Select Subject
Select Subject and Inverse work very well together.
Here is a simple workflow.
Step 1: Select Subject
Go to:
Select > Subject
Photoshop automatically detects the main subject.
Step 2: Review the Selection
Zoom into the image.
Check the edges around:
- Hair
- Clothing
- Product edges
- Small objects
You can improve the selection if needed.
Step 3: Invert the Selection
Go to:
Select > Inverse
Now Photoshop selects everything around the subject.
Step 4: Make Your Changes
You can edit the background without changing the subject. This workflow is popular because it reduces the amount of manual selection work.
How to Select the Background by Inverting a Selection
One of the most common reasons people search for how to invert a selection in Photoshop is background editing. Suppose you have a product image. You first select the product.
However, your goal is not to edit the product. You want to change the background. Here’s what you can do.
Select the Main Object
Use the Object Selection Tool or Select Subject. Make sure the product is selected.
Invert the Selection
Press:
Shift + Ctrl + I on Windows
or:
Shift + Command + I on Mac
Now the background is selected instead of the product.
Edit the Background
You can now:
- Delete the background
- Change the background color
- Add blur
- Adjust brightness
- Change saturation
- Apply filters
The product remains protected because it is no longer selected.
How to Invert a Selection and Delete the Background
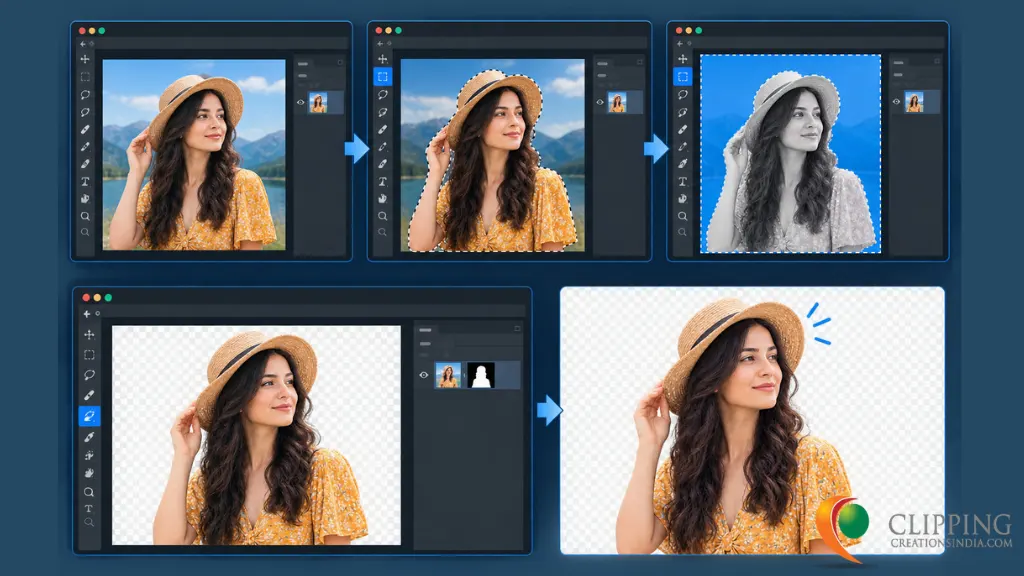
If your goal is to remove a background, inverting the selection can help.
Follow these steps.
Select the Main Subject
Use your preferred selection tool.
For example, select a person or product.
Invert the Selection
Use:
Select > Inverse
Now the background is selected.
Delete the Background
Press the Delete key.
However, make sure your image layer can support transparency. If the layer is locked, double-click the Background layer and convert it into a normal layer. After deleting the selected background, you should see a transparent area. Photoshop represents transparency with a checkerboard pattern.
How to Invert a Selection to Blur the Background
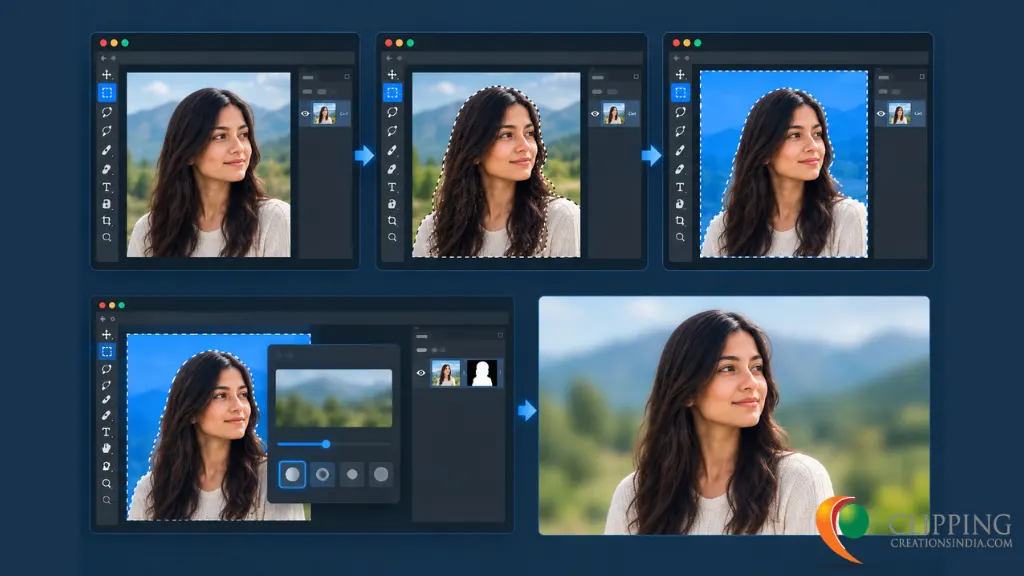
Background blur is another useful example. Imagine that you have a portrait photo. You want the person to remain sharp, but you want the background to become blurry.
First, select the person. Then invert the selection. The background is now selected. You can apply a blur effect to the selected area.
For example:
Filter > Blur > Gaussian Blur
Adjust the blur amount until the background looks natural. Because the person is not selected, the blur affects only the background.
This technique is useful for:
- Portrait photography
- Product photography
- Social media images
- Marketing visuals
How to Invert a Selection for Color Adjustment
You can also use Inverse when adjusting colors. For example, imagine a photo of a person standing in front of a green background. You want to change the color of the background without affecting the person.
First, select the person. Then invert the selection. The background becomes selected.
You can now adjust:
- Hue
- Saturation
- Brightness
- Contrast
For a safer editing workflow, you can also use adjustment layers.
This allows you to make changes without permanently changing the original pixels.
Common Mistakes When Inverting a Selection
Even though the process is simple, a few mistakes happen often.
- Inverting without an active selection: If nothing is selected beforehand, inverting will select the entire image, which usually isn’t what you want.
- Working on the wrong layer: Always check that you’re on the correct layer before selecting. Inverting on the wrong layer won’t give you the result you expect, even if the selection itself looks right.
- Forgetting to feather the edges: Some edits need softer selection edges. Skipping the Feather option before or after inverting can leave hard, visible lines around your edited area.
Conclusion
Even though it’s really easy to find out how to invert a selection in Photoshop, it helps speed up so many edits. You can remove backgrounds, alter colors, blur the background or make adjustments around the subject with this feature.
The best way for beginners to understand the tool is simply by practicing. Choose a basic image, click on an object, disguise the selection and alter the background.
Once you use it a couple of times, Invert Selection is one of those little Photoshop features that can save time in virtually every edit.