
How to Fix Blurry Pictures: 7 Easy Ways to Sharpen Photos
- August 24, 2026
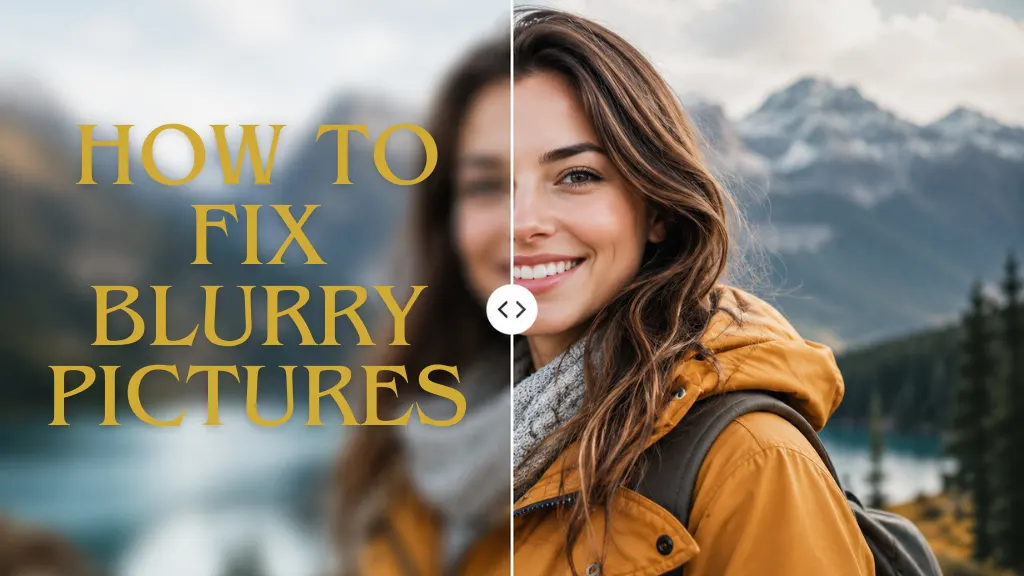
Despite an amazing moment, a blurry picture might ruin everything. For example perhaps the camera moved as taking the shot, or you were moving and so was your subject, the lens did not focus properly or original image is too small. Luckily, a blurry image is something that can be fixed most times with the right technique.
The best approach depends on why your image is blurry. Moderate blur is common and can sometimes be fixed with sharpening, clarity or AI adjustments. An example of where an extremely out-of-focus photo is virtually impossible to recover completely, or at least as the first image contains no discernable detail.
This guide covers how to deblur photos about Photoshop, AI photo enhancers and mobile application as well as practical methods.
Why Are Pictures Blurry?
Having an understanding of what went wrong in the first place is often helpful before you attempt to fix a blurry image. Various monadic blurs require various types of editing.
Common causes include:
- Camera shake: Small movements as you press the shutter can make your images soft.
- Motion blur: An object in motion, such as a person, animal or vehicle, will be elongated or fuzzy looking.
- Incorrect focus: Camera focuses on the background instead of us!
- Low resolution: Scaling up a small image might seem blurry and soft.
- Poor lighting: Poor light means slower shutter speed and camera shake.
- Lens problems: Cloudy or dirty lens, reduces the clarity of the images.
- Compression: Saving or re-sharing an image too many times can lose the little details.
By identifying what kind of blur you are dealing with, it allows you to use a more targeted solution.
How to Fix Blurry Pictures
Here are several ways to make a blurry picture clearer.
1. Use Photoshop to Sharpen the Image
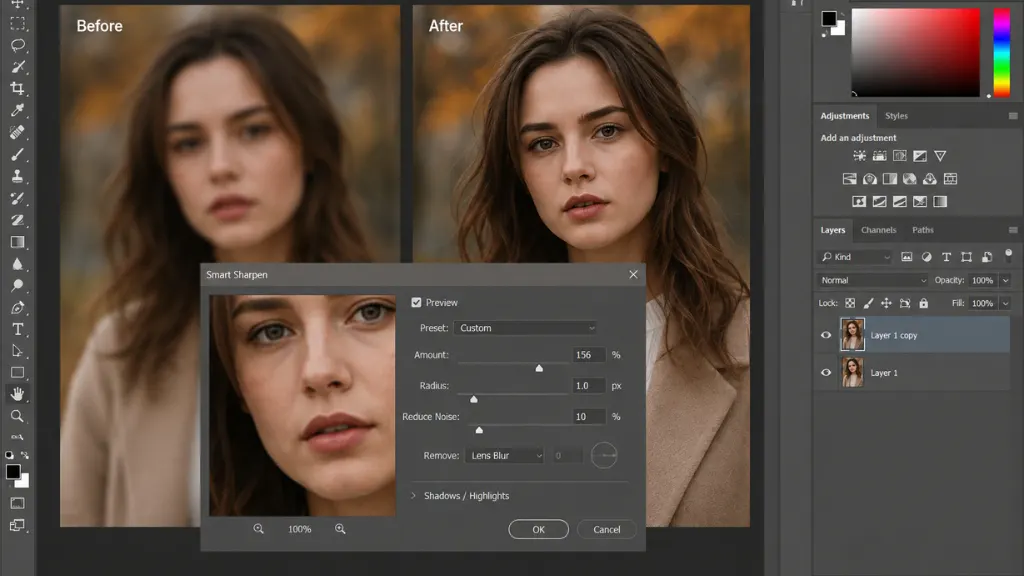
Adobe Photoshop is one of the most useful options when you want more control over a blurry photo. Start by opening your picture in Photoshop. Before making changes, create a duplicate of the original layer so you can compare the edited version with the original.
Then:
- Open the blurry picture in Photoshop.
- Duplicate the image layer.
- Select Filter > Sharpen > Smart Sharpen.
- Adjust the Amount to increase edge definition.
- Adjust Radius to control how much detail is affected.
- Use Reduce Noise if the image becomes grainy.
- Zoom in and check important areas such as the eyes, hair, and edges.
- Click OK when the result looks natural.
Don’t push the sharpening too far. Excessive sharpening can create bright outlines around objects and make the photo look unnatural.
2. Try Photoshop’s Camera Raw Filter
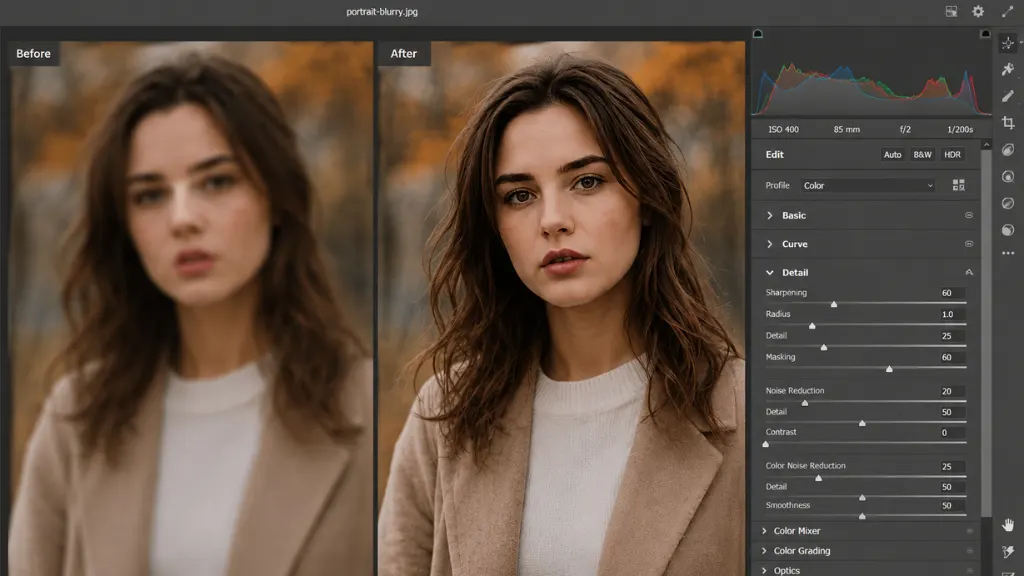
Another useful Photoshop method is the Camera Raw Filter. It gives you several controls for improving perceived detail without relying only on traditional sharpening.
Open the image and go to:
Filter > Camera Raw Filter
In the editing panel, adjust:
- Texture to bring out fine details.
- Clarity to improve midtone contrast.
- Sharpening to make edges more defined.
- Noise Reduction if sharpening introduces grain.
Make small adjustments rather than moving every slider to the maximum. For portraits, be especially careful with skin. Too much texture and sharpening can emphasize pores and noise.
3. Use an AI Image Enhancer
AI photo enhancement has become a practical option for blurry or low-resolution images. Modern AI enhancers can analyze patterns in an image and estimate missing detail. Depending on the original photo, they may improve:
- Facial details
- Hair
- Eyes
- Edges
- Fine textures
- Low-resolution images
- Slightly out-of-focus areas
A typical workflow is simple:
- Upload the blurry picture.
- Choose an enhancement or sharpen option.
- Let the tool process the image.
- Compare the result with the original.
- Reduce the enhancement if the image looks artificial.
- Export the improved image.
AI can produce impressive results, but it doesn’t magically recover every detail from a badly blurred photograph. Some tools may also generate details that weren’t actually present in the original.
4. Use Unsharp Mask for Quick Sharpening
If you need a straightforward sharpening method in Photoshop, Unsharp Mask can work well.
Go to:
Filter > Sharpen > Unsharp Mask
You’ll usually see three controls:
- Amount: Controls the strength of sharpening.
- Radius: Controls the width of the sharpening effect.
- Threshold: Determines how different pixels must be before sharpening is applied.
Start with a low amount and gradually increase it. Watch the edges carefully. If you see halos or harsh outlines, reduce the settings. This method works particularly well for images that are only slightly soft.
5. Use High Pass Sharpening in Photoshop
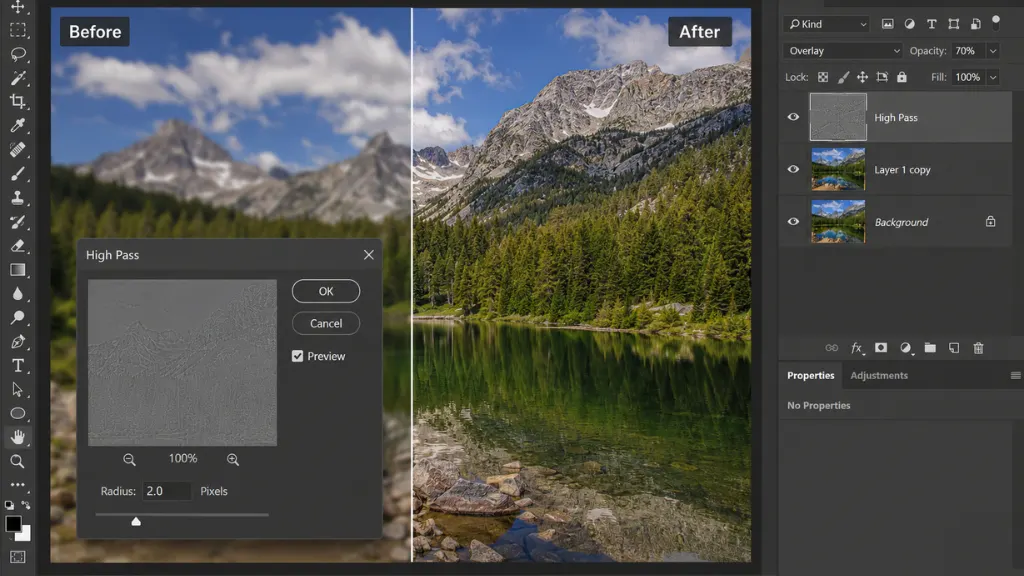
High Pass sharpening gives you another way to increase edge detail while keeping the original image underneath.
To try it:
- Duplicate your image layer.
- Select Filter > Other > High Pass.
- Choose a small radius.
- Click OK.
- Change the duplicated layer’s blending mode to Overlay or Soft Light.
- Adjust the layer opacity until the image looks natural.
The advantage of this method is that you can control the sharpening through layer opacity. It’s especially useful when you want to sharpen specific areas without making the whole image extremely crisp.
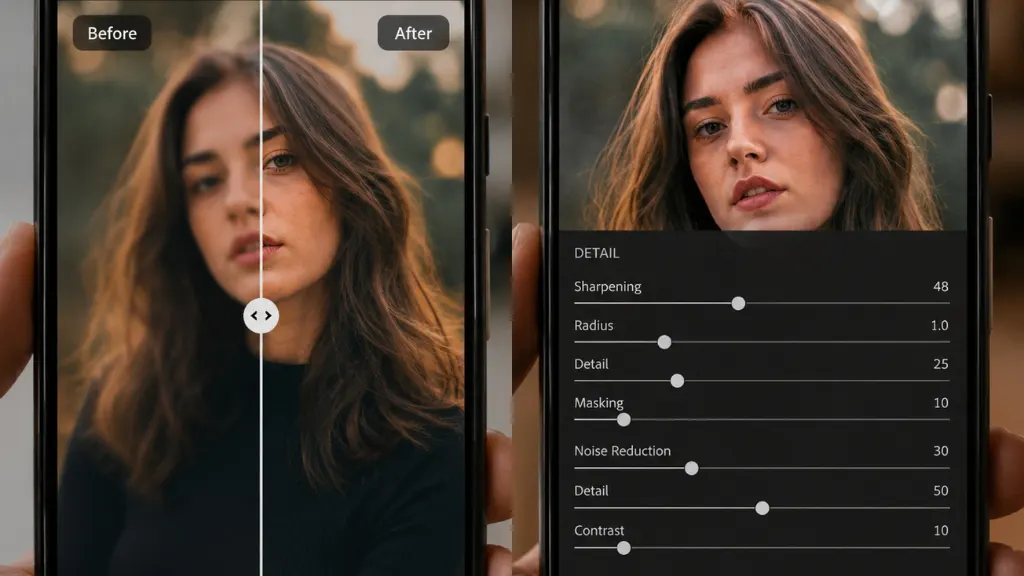
6. Fix Blurry Pictures on Your Phone
You don’t always need a computer to improve a blurry photo. Many mobile photo editors include sharpening, clarity, definition, or structure controls.
A basic workflow looks like this:
- Open the photo in your editing app.
- Find Sharpness, Definition, or Clarity.
- Increase it gradually.
- Adjust contrast slightly if necessary.
- Reduce noise if the photo becomes grainy.
- Save a copy instead of replacing the original.
If the image is heavily blurred, look for an AI enhancement feature rather than relying only on a sharpness slider.
7. Increase Image Resolution Carefully
Sometimes an image is blurry because often, it is too small. Suppose that you have a 500 × 500 pixel image but decide to enlarge it very heavily for a print. This means the software has to invent more pixels, which can leave the image looking soft or blocky.
Sometimes an AI upscaling tool can assist by enlarging and retaining or rebuilding extraneous features.
However, upscaling and sharpening aren’t the same thing.
- Sharpening improves the appearance of existing edges.
- Upscaling increases the image dimensions.
- AI enhancement may attempt to reconstruct missing detail.
For a small, slightly blurry image, combining upscaling with moderate sharpening can produce a better result than using either method alone.
Can You Completely Fix a Blurry Picture?
That probably depends on what blur you are dealing with and how much. Even a rather soft image may look much better after sharpening or AI sharpness. A blurry 40×30 px image can also get better after zooming.
But, serious motion blur or focus difficulties can irretrievably lose vital details from the image. Editing software can only do so much to recover the details that the camera never even saw. Image Sharpening Sharpness is a relative term that refers to how well the details of an image are outlined.
Final Thoughts
How To Fix Blurry Pictures (The Best Way) Whether you can fix blurry pictures depends on the cause of blur. Photoshop’s sharpening tools are usually sufficient for mild softness. AI deblurring and upscaling can assist with low resolution or more challenging images.
Make the small changes and try to compare with this original. When you notice halos, excessive noise, odd facial details or an artificial impression—decrease an effect.
One thing to remember is that you can fix a blurry image, but you can’t go too far in restoring detail lost by the original camera.