
How to Change the Color of Something in Photoshop?
- August 23, 2026
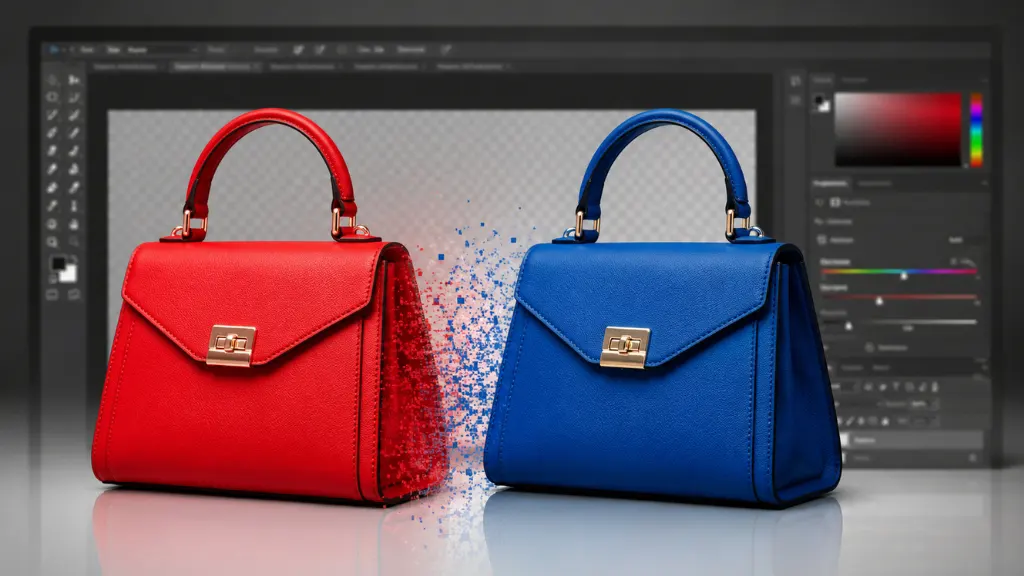
Object color changes in Photoshop come in handy when you want to sample different product colors, change something you wish weren’t colored, match a certain design or create similar looking images.
The existing process in Photoshop is convenient. For most objects, the recommended approach is to individual select the object and modify its color using a Hue/Saturation adjustment layer. This is a non-destructive editing approach as the original image is still preserved and the color change can be blanked out or modified at any point in the future. This is also the technique recommended Adobe for replacement of colors in objects as the adjustment and the mask layer let the user change the outcome as per their preferences.
This article teaches you how to change the color of an object in Photoshop and how select an object, Hue/Saturation, Colorize and the edge and shadow and highlight fixing techniques.
How to Change the Color of Something in Photoshop
This is the method to use for most color-changing jobs. It gives you control over the selection, hue, saturation, and lightness while keeping the original image intact. Adobe’s current Photoshop instructions use a Hue/Saturation adjustment layer for replacing selected object colors.
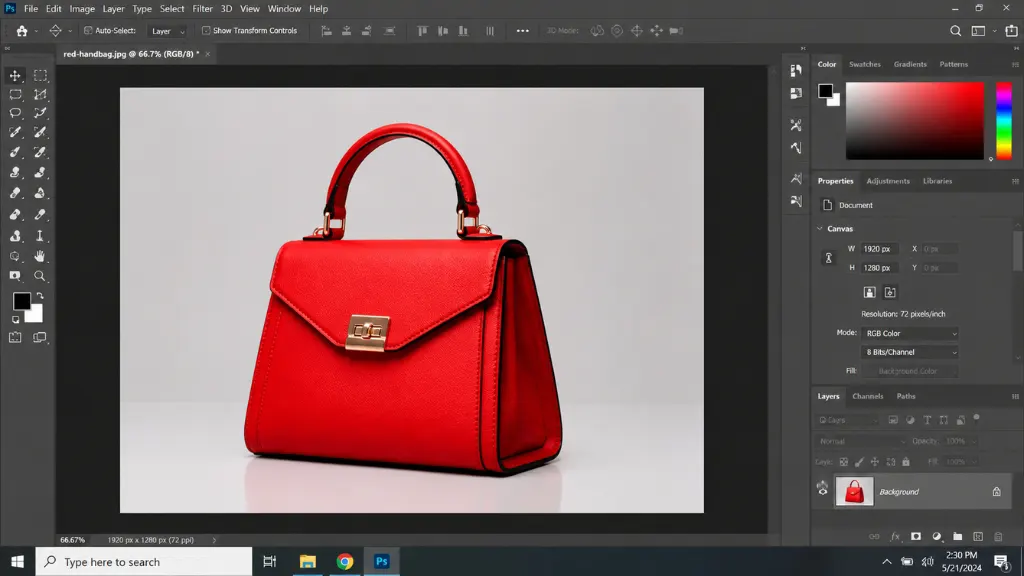
1: Open Your Image in Photoshop
Open Photoshop and select File > Open. Choose the image which wants to change the color. When the image opens look at the layer panel that you are working on the correct layer.
2: Select the Object
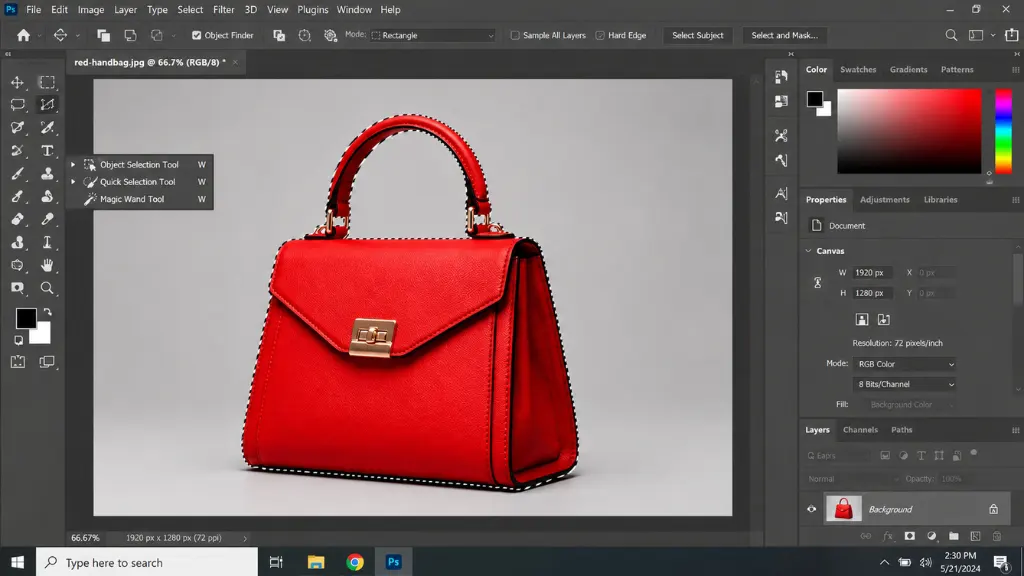
The next step is to select the specific object you want to change the color.
For example, if you’re changing the color of a handbag, select the handbag rather than the entire image.
You can use Photoshop’s selection tools, such as:
- Object Selection Tool
- Quick Selection Tool
- Select Subject
- Lasso Tool for manual selections
For objects with a clear shape, the Object Selection Tool or Quick Selection Tool can save time. Make sure the selection that every edge is selected perfectly.
3: Add a Hue/Saturation Adjustment Layer
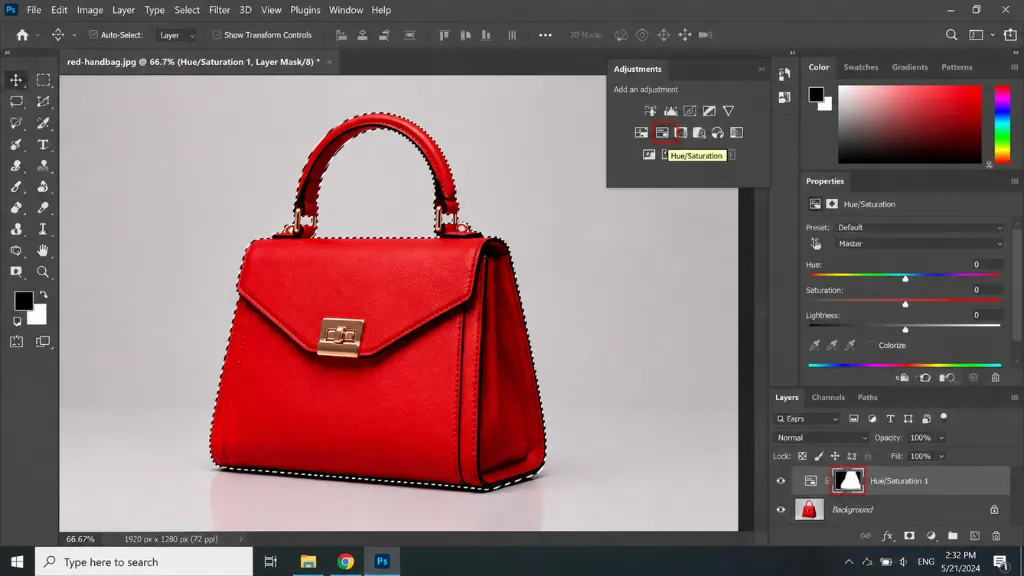
When you make the proper object selection, go to the Adjustments panel and choose Hue/Saturation.
Photoshop creates a Hue/Saturation adjustment layer with a mask based on your selection. This means the color adjustment affects the selected object instead of changing the whole photograph.
You can also create the adjustment through:
Layer > New Adjustment Layer > Hue/Saturation
The adjustment layer is preferable to directly changing the pixels because you can return to it later and change the settings.
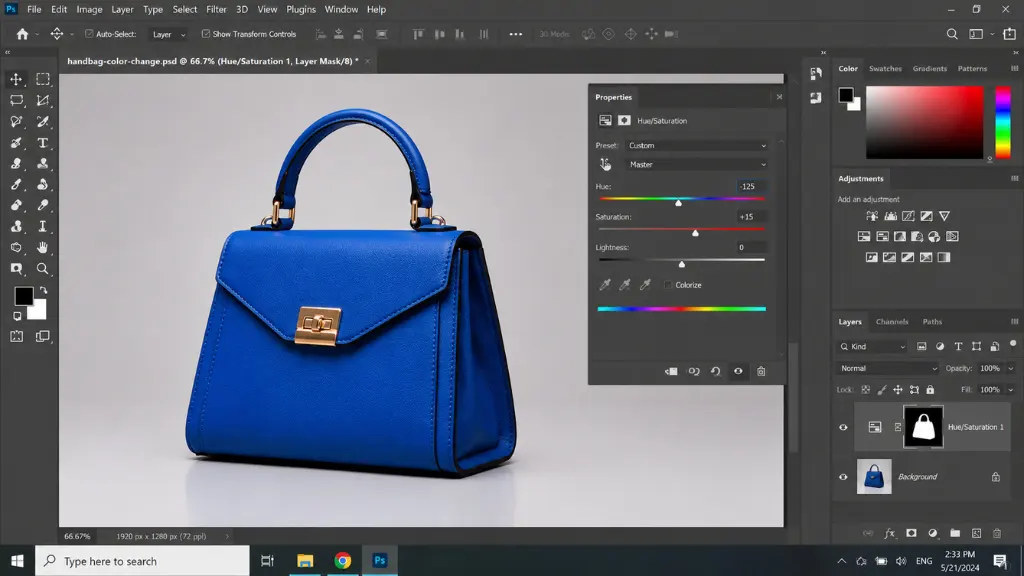
4: Move the Hue Slider
Now look at the Properties panel.
You’ll see controls for:
- Hue
- Saturation
- Lightness
Move the Hue slider to change the object’s color. For example, moving the slider can turn a red handbag into purple, blue, green, or another color.
Don’t worry about finding an exact value immediately. Move the slider slowly until you get close to the color you want.
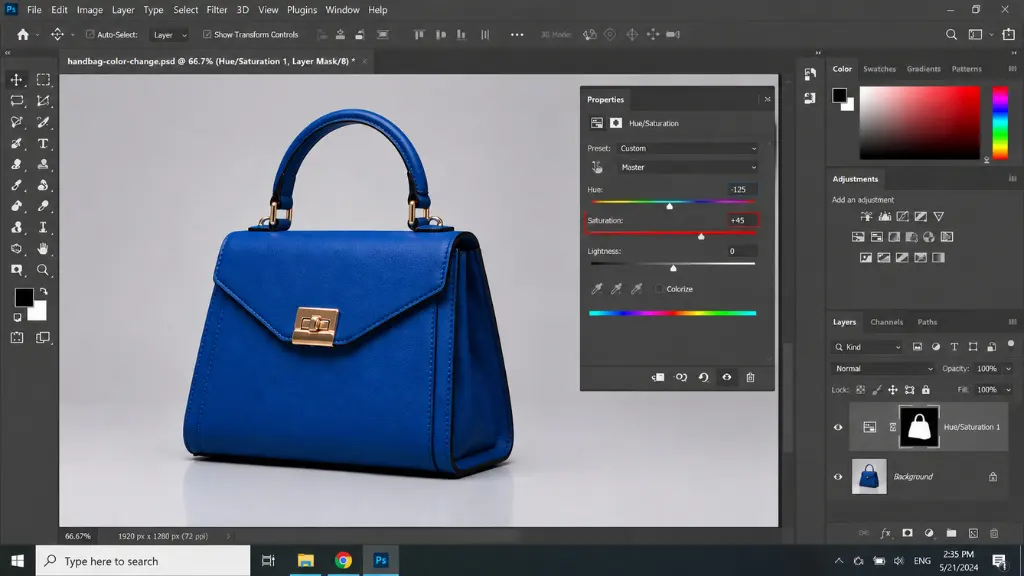
5: Adjust Saturation
After choosing the new hue, adjust Saturation. Saturation controls how intense the new color looks.
For example:
- Lower saturation creates a softer, muted color.
- Higher saturation creates a stronger, brighter color.
Avoid pushing saturation too far. A highly saturated color can make an edited object look unnatural.
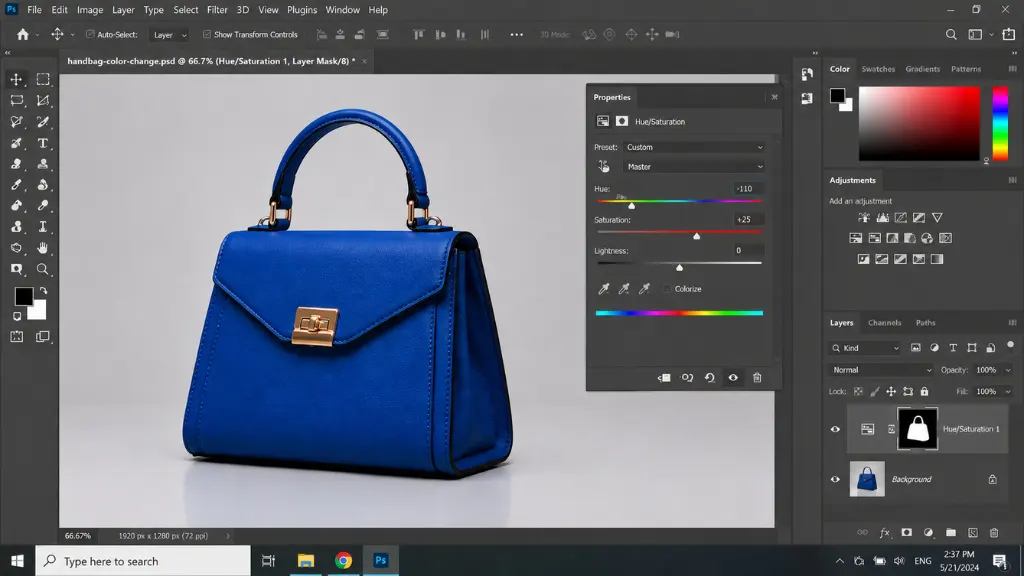
6: Keep Lightness at 0 First
The Lightness slider changes how bright or dark the object becomes. For a natural color replacement, start with Lightness at 0. This helps preserve the original contrast and lighting of the object. Adobe specifically recommends leaving Lightness at 0 when replacing object colors to maintain contrast. If the new color looks too dark or too bright, you can make a small adjustment later.
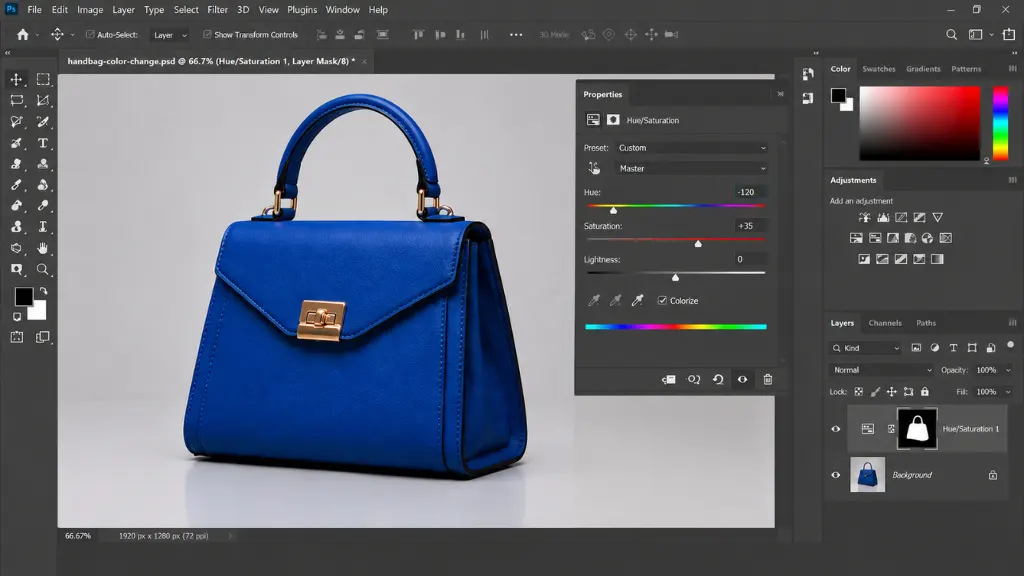
7: Turn On Colorize When the Color Isn’t Changing Properly
Sometimes moving the Hue slider doesn’t completely replace the original color. This can happen when the original object has a strong color or when you want to make a more complete color replacement.
In that situation, enable Colorize in the Properties panel. Colorize applies a more direct single-color treatment, which can help when the original color continues to affect the result. Adobe’s current instructions specifically recommend selecting Colorize when the original color tints the new color. After enabling Colorize, adjust Hue and Saturation again until the object looks right.
8: Refine the Layer Mask
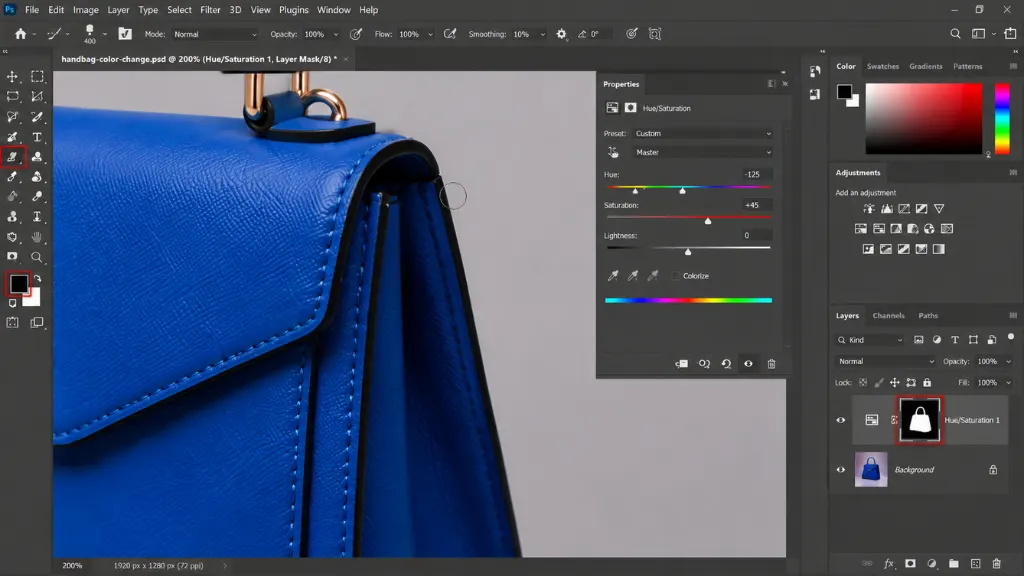
After changing the color, zoom into the edges of the object. You may notice small areas that weren’t selected or parts of the background that accidentally received the color adjustment.
The adjustment layer’s mask lets you fix these areas without editing the original photo. Adobe’s current Photoshop documentation explains that masks can be painted to control exactly where an adjustment affects an image.
Click the mask thumbnail on the Hue/Saturation layer.
Then use a soft brush:
- White reveals the color adjustment.
- Black hides the color adjustment.
- Gray partially reveals the adjustment.
Paint carefully around the object’s edges.
9: Check the Result at Different Zoom Levels
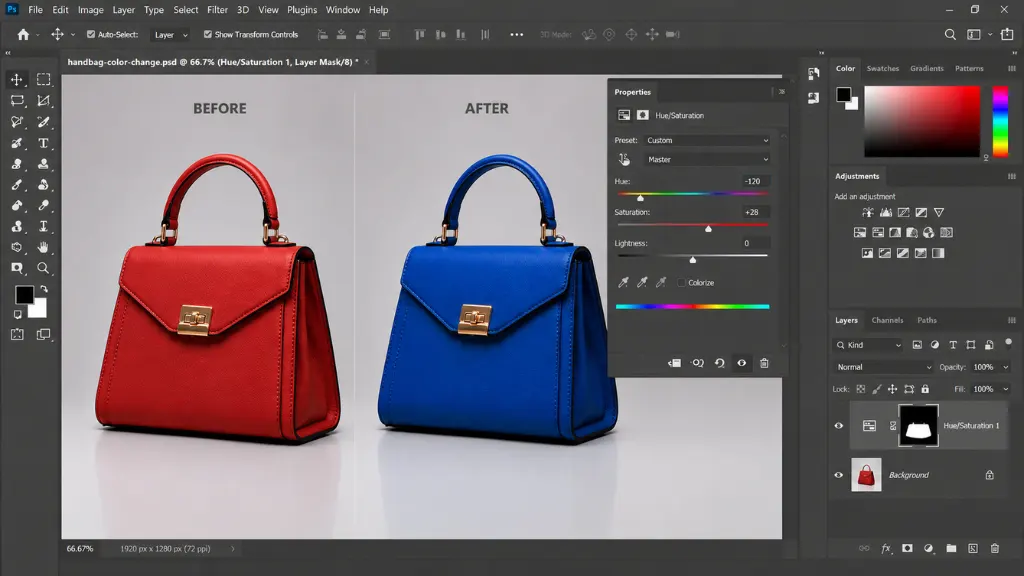
Zoom out and look at the entire image. An object may look perfect when you’re zoomed in but appear too bright, too saturated, or unrealistic when viewed at normal size.
Check:
- Object edges
- Shadows
- Highlights
- Reflections
- Texture
- Color intensity
- Background contamination
If something looks wrong, go back to the Hue/Saturation settings or paint on the mask again.
10: Save Your Photoshop File
When you’re satisfied with the result, save the project as a PSD file if you want to keep the adjustment layer and mask editable.
Go to:
File > Save As
Choose Photoshop’s PSD format.
This allows you to return later and change the Hue, Saturation, Colorize settings, or mask without starting over. If you need a finished image for a website or social media, export another copy in a suitable format such as JPEG or PNG.
Conclusion
If you want to change the color of an object, no painting over is needed in Photoshop – this works without losing the original image! The simplest workflow is to identify your target object, duplicate it onto a Hue/Saturation adjustment layer, adjust the Hue and Saturation levels and refine the mask whenever required.
Check Colorize for a challenging color replacement. If they are black or white, use a Solid Color fill layer with the Color mode so that you do not affect its original lighting and texture.
After you feel comfortable with selections and layer masks, you can apply the same technique to produce other product colors, clothing styles, car colors, furniture finishes and a variety of other photo adjustments.