
How to Make an Image Transparent: A Complete Beginner’s Guide
- August 23, 2026
You download a logo, or maybe a product photo, and there it is — that annoying white box sitting around it like it doesn’t belong. This is usually the exact moment people go searching for how to make an image transparent. And honestly, once you understand what’s actually happening, it stops being confusing. Transparent just means the background is gone. Not white, not gray — gone. Only the subject is left, and whatever sits behind it (a website, a slide, another photo) shows through instead. That’s the standard for logos on a header, product photos on Amazon or Shopify, PNG stickers, thumbnails, basically any graphic that has to sit on top of something else without dragging a box along with it.
It sounds like a technical skill, but it’s really not, once you’ve done it a couple of times. Small shop owners, resellers, people building a personal brand on the side, designers working through a stack of client files — everyone hits this at some point. So here’s the rundown: what transparency actually is, why it matters more than people think, which tools are worth your time, and when it’s genuinely better to just pay someone who does this every single day instead of fighting with a selection tool at 11pm.
What Is Image Transparency
Image transparency, at its core, means part of the picture has no color data attached to it at all — so whatever’s behind that part just shows through. In most editors you’ll see this as a gray-and-white checkerboard. That’s not a bug or a texture, it’s the software’s way of saying “nothing’s here, this bit is empty.”
People confuse this with a white background all the time, and it’s an easy mistake to make. But white is still a color. It’s still a filled-in block, and the second you drop that image onto anything that isn’t also white, you’ll see the box. Real transparency skips all of that — the image just sits on the page like it was always meant to be there, no matter the color underneath.
Under the hood, this runs on something called an alpha channel — think of it as a fourth layer of information sitting next to red, green, and blue, telling the file how see-through each pixel should be. PNG, GIF, and WebP can all store this. JPEG can’t. Doesn’t matter how you edit a JPEG, it will never actually be transparent, because the format itself has no room for that data.
Why Use a Transparent Background
Not every image needs this. But there are a handful of situations where it stops being optional:
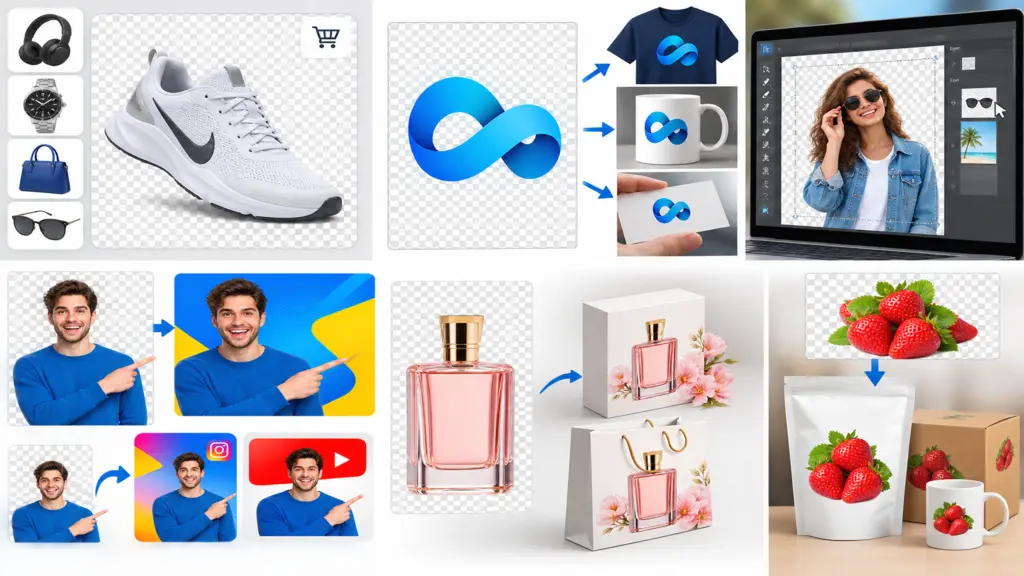
- Selling on marketplaces – Amazon, Etsy, Walmart, and most others expect clean or transparent product shots so the whole catalog looks like it belongs together, not like five different photographers shot it.
- Logos – Probably the biggest one. A logo boxed in white looks fine on a white page and terrible everywhere else — a colored header, a mug, a business card, take your pick.
- Design and marketing layouts – Designers stack transparent layers constantly, icons over photos, cutouts over text. None of that works if each piece is still dragging its own background around with it.
- Social posts and thumbnails – Putting a product or a person over a colorful backdrop only works if the original photo has nothing behind the subject to begin with.
- Print and packaging – A transparent file lets someone drop a graphic exactly where it needs to go without a visible rectangle trailing behind it onto the page.
Best File Formats for Transparent Images
Format matters here just as much as the actual editing. Some formats can’t hold transparency no matter what you do.
- PNG — still the default choice. Sharp, widely supported, works well for logos, icons, product cutouts.
- GIF — technically transparent, but only all-or-nothing. A pixel is either fully see-through or fully solid, so edges can look rough.
- WebP — newer, supports full transparency, and keeps the file size down, which websites tend to appreciate.
- SVG — vector, so it’s naturally transparent since it’s built from math and shapes rather than actual pixels. Scales up or down without losing sharpness.
- JPEG — no support, period. If the file needs to be see-through, JPEG just isn’t an option — export as PNG, WebP, or SVG instead.
Remove Background Online for Free
No need for expensive software anymore, honestly. A browser and a free tool gets most people 90% of the way there.
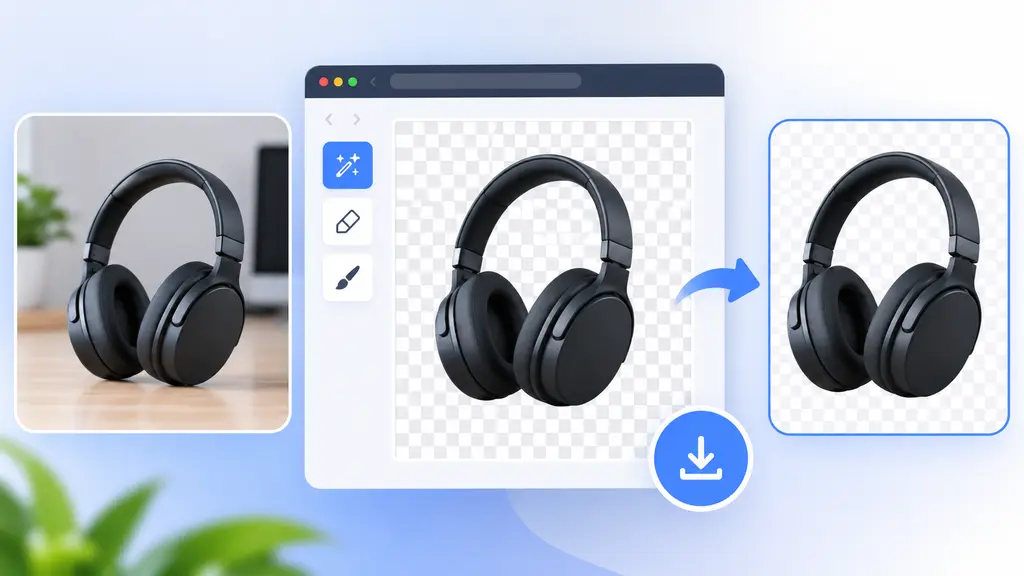
- Upload the photo to a background remover site — most of them run AI that spots the main subject and cuts it out almost instantly, sometimes in under 10 seconds.
- Check the checkerboard preview — if you see that pattern where the background used to be, it actually worked, it’s not just switched to white behind the scenes.
- Use the eraser or restore brush if the tool has one. Hair, fur, and fine edges are usually where the automatic cut falls apart a little.
- Download as PNG or WebP. This part trips people up more than you’d think — save it as the wrong format and the transparency disappears the moment you open the file again.
Works great for simple stuff. A product on a plain backdrop, a headshot with a basic background — that kind of image.
Remove Background in Photoshop
If you want more control, this is still where most designers end up.
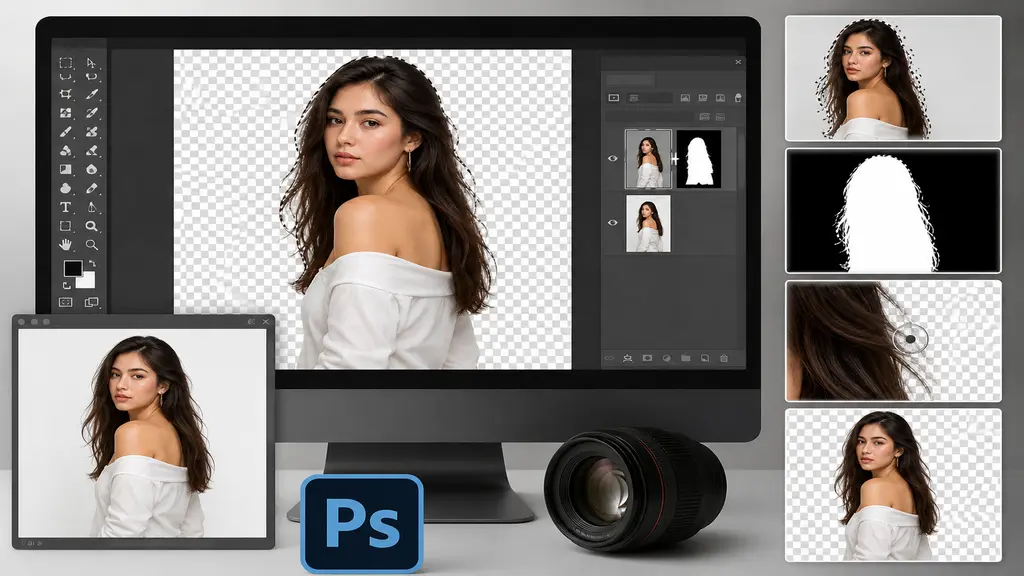
- Duplicate the background layer first, so the original stays untouched in case something needs fixing later.
- Use Select Subject or the Object Selection Tool to get a rough automatic outline of the main subject.
- Turn that selection into a layer mask instead of deleting pixels outright — masks don’t destroy anything, which matters if a client asks for a revision three days later.
- Zoom in and clean up the mask by hand, especially around hair, shadows, and edges, where automatic selection tends to fall short.
- Export as PNG, and make sure “Transparency” is actually checked before hitting save — easy to miss.
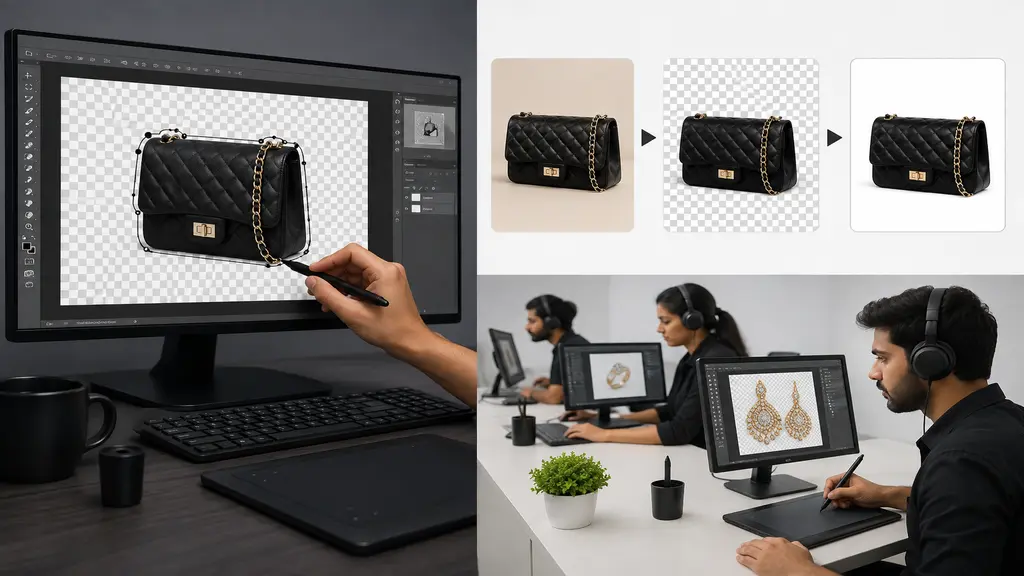
A mask over deletion means you can always undo or adjust later without touching the original pixels. For genuinely tricky stuff — flyaway hair, semi-transparent fabric, jewelry with reflections — a lot of retouchers still fall back on the Pen Tool to trace a proper clipping path by hand. Slower, but the edges end up cleaner than almost anything automatic can manage.
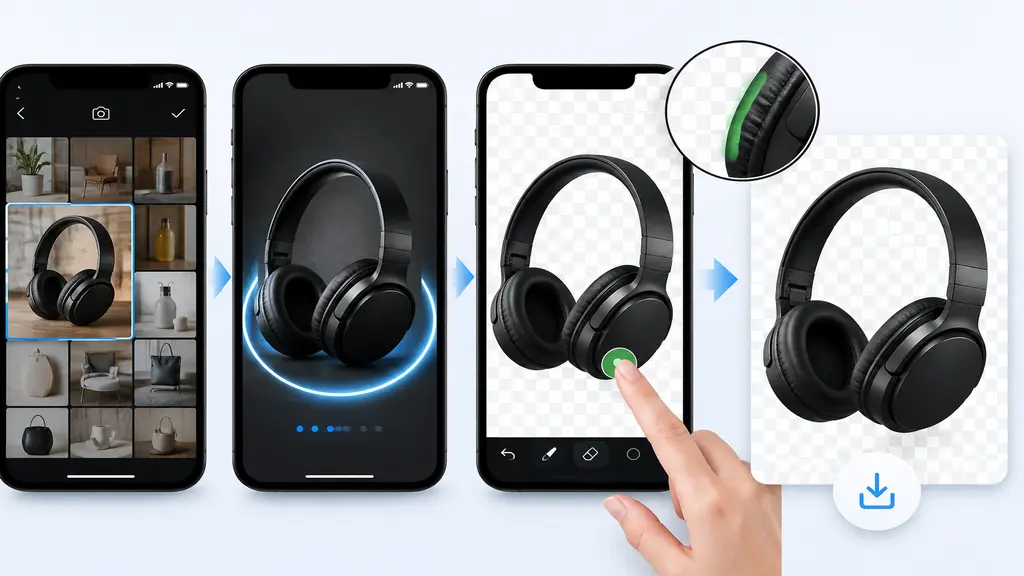
Remove Background on Your Phone
Desktop isn’t always an option, and mobile apps have gotten decent at this.
- Grab a background remover app from your phone’s app store, ideally one with AI-based cutout support.
- Import the photo right from your camera roll and let it process on its own.
- Touch up the cutout manually if part of the subject got cut off wrong — most apps have a basic erase-and-restore brush.
- Export as PNG so the transparency actually holds once you share or upload the file somewhere.
Fine for quick posts. But for bulk product photos or anything commercial, mobile apps tend to struggle — they’re mostly trained on common subjects like people and pets, so unusual shapes, glass, jewelry, or busy backgrounds throw them off more than you’d expect. Worth a close look before using the result anywhere public.
Common Mistakes to Avoid
A few small things ruin otherwise decent work here, over and over:
- Saving as JPEG – This undoes everything; the transparent area just fills back in with a solid color the second you export it wrong.
- Ignoring the edges – A faint white or gray outline (people call it a “halo”) left around the subject makes the whole thing look unfinished, even if the rest of the cutout is clean.
- Trusting automatic tools blindly on complicated photos – Fine hair, transparent fabric, reflective surfaces almost always need a manual pass after the AI does its first attempt.
- Skipping the resolution check – Blow up a small image after removing the background and you’ll get blur and pixelation fast, especially if it’s headed to print.
- Only checking it against a white canvas – It can look flawless on white and still show leftover background pixels the moment you place it on something darker. Test it against a couple of different colors first.
- Not keeping the original file – Once a PNG is flattened and exported, going back for more edits gets a lot harder without an untouched copy saved somewhere.
When to Hire a Background Removal Expert
Doing it yourself works fine for the occasional photo here and there. But once you’re staring down hundreds of product images, complicated subjects, or a marketplace with strict image rules, it starts making a lot more sense to hand it off. A professional editor traces things by hand — pixel by pixel in a lot of cases — which matters most for jewelry, transparent products, or fashion shots with hair and fur, exactly the spots where automatic tools tend to leave rough edges behind. If you’d rather skip the back-and-forth and just get studio-ready files, a dedicated background removal service can take care of bulk orders with quick turnaround and results that stay consistent across an entire catalog.
Conclusion
Once you actually know how to make an image transparent, it opens up more than most people expect going in — cleaner listings, sharper logos, marketing graphics that don’t fight with whatever background they’re placed on. Free tools and mobile apps cover the quick, casual edits just fine. Photoshop is there when the job needs real precision. But when quality and turnaround genuinely matter — a full e-commerce catalog, a brand identity, anything client-facing — it’s often worth handing off to someone who does this all day. Whatever route you pick, just remember: save the final file as PNG, WebP, or SVG, or none of that transparency survives past the export.
