
How to Edit a Background Into a Picture: A Complete Guide
- August 29, 2026

You know that feeling when a photo is almost perfect, except the background completely ruins it? Maybe there’s a stranger walking through the frame, or the wall behind you is a mess, or you just want your product shot on plain white instead of your kitchen counter. That’s the moment most people start typing “how to edit a background into a picture” into Google, and honestly, it’s one of the more forgiving skills to pick up. You don’t need years of design training. You need a decent tool, a bit of patience, and maybe one or two failed attempts before it clicks.
This guide covers what background editing actually means, why so many people bother with it, and how to do it yourself from start to finish. Toward the end, I’ll also point you toward a faster option if you’d rather not spend your evening fighting with selection tools.
What Is Background Editing?
At the simplest level, background editing means taking a subject out of its original photo and dropping it onto a different backdrop. Could be a solid color, could be a totally different scene, could be nothing at all (that’s the transparent version). It’s everywhere once you start noticing it — Instagram photos, Amazon listings, magazine covers, even your coworker’s LinkedIn headshot.
The process really breaks down into two parts. First, you separate the subject from whatever’s currently behind it. People call this “cutting out” or “clipping,” and it’s exactly what it sounds like. Second, you place that subject onto something new. The tricky bit isn’t really either step on its own — it’s making the final result look like it was shot that way in the first place, not glued together in an app.
A quick note on terms, because people mix these up constantly: background removal and background editing aren’t quite the same. Removal is just step one — taking the old background out and leaving transparency behind. Editing is the whole job, removal plus whatever comes after. When someone searches how to edit a background into a picture, they usually want the full thing, start to finish.
How Background Editing Works
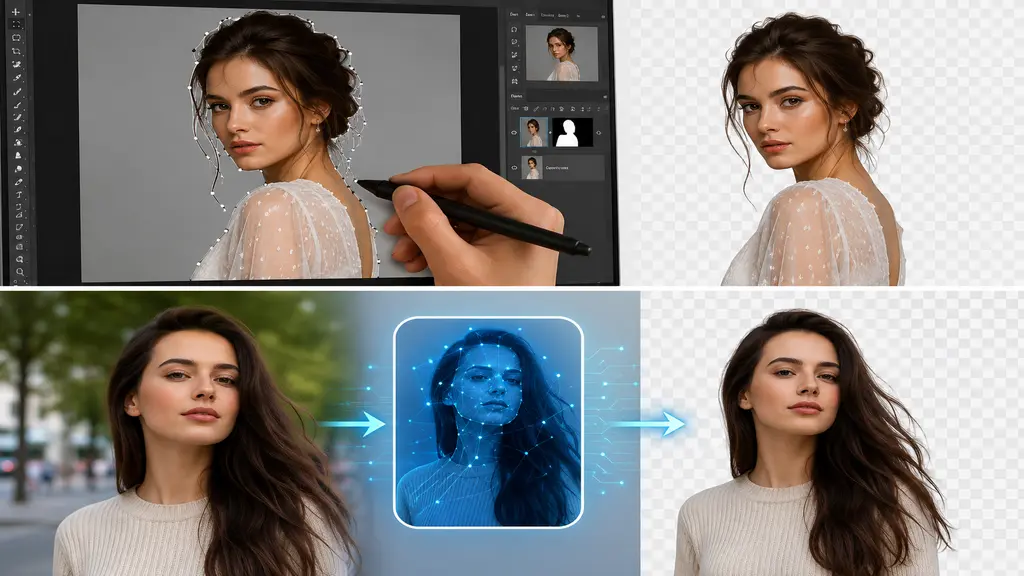
There are basically two ways people do this. The old-school way is manual selection — you (or someone who edits photos for a living) trace around the subject by hand, usually with something like Photoshop’s Pen Tool. It’s slower, but it still wins on tricky images. Flyaway hair, sheer fabric, tiny jewelry details — a trained eye catches things software still gets confused by.
Then there’s AI detection, which is what most free apps run on now. You upload a photo, an algorithm scans it, decides where you end and the background begins, and spits out a cutout in a few seconds. It’s fast, and for a lot of everyday photos it’s genuinely good enough. But it’s not magic. Busy backgrounds trip it up. So does a subject wearing colors close to the background. Hair especially — that’s where AI tools still fumble, which is usually the point where someone goes back in and cleans up by hand anyway.
Why Change a Background
People land on this topic for all kinds of reasons. Here are the ones that come up most:
- Product photography — most online stores need plain white or transparent backgrounds no matter what the original photo looked like.
- Professional headshots — nobody wants their cluttered bedroom in the background of a LinkedIn photo, so swapping it for something neutral fixes that instantly.
- Creative projects — sometimes you just want to put yourself on a beach or in front of a skyline without booking a flight.
- Passport and ID photos — most government forms require a specific background, and editing saves you a trip back to the photo booth.
- Social media content — cleaner backgrounds tend to stop the scroll more often, which matters if you’re posting regularly.
Tools You Need
Before jumping into steps, it’s worth knowing what’s actually out there. You don’t need to learn all of these — just pick whatever matches your budget and how comfortable you are with editing software.
- Adobe Photoshop — still the gold standard, with precise tools like the Pen Tool and Select Subject for anyone who wants full control.
- Canva — browser-based, dead simple, good for beginners who want a decent result without a learning curve.
- Remove.bg — upload a photo, get a cutout back in seconds. About as low-effort as this gets.
- GIMP — free and open-source, roughly Photoshop’s less polished cousin, but it gets the job done.
- Mobile apps — PicsArt, Background Eraser, Snapseed. Handy if you’re editing on your phone and don’t want to touch a laptop.
Free vs. Paid Tools
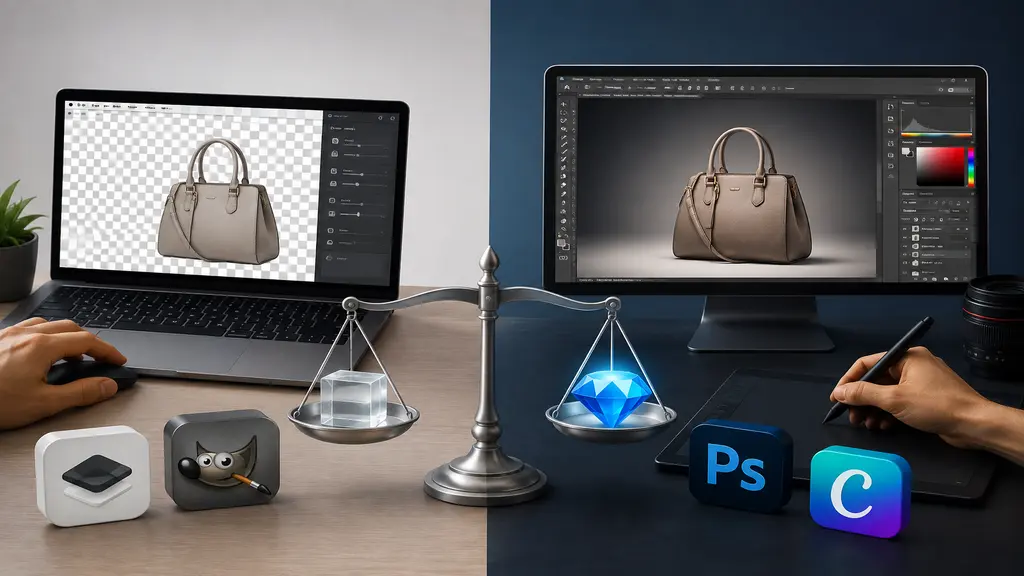
Free tools are a fine place to start, especially if you’re only doing this occasionally. Remove.bg or GIMP can handle a simple, clean-background photo without you spending a rupee. Paid tools like Photoshop or Canva Pro earn their price when things get complicated — fine detail work, batch processing, more control over edges and lighting. If this is a one-off task, don’t bother paying. If it’s becoming a weekly thing, either invest in a proper tool or, honestly, just hand it off to someone who does this for a living.
Steps to Edit a Background
Here’s the actual process, roughly the same no matter which tool you pick.
- Start with a good photo. Sharp edges, decent lighting, subject clearly separated from what’s behind them — all of this saves you time later.
- Select your subject. Pen Tool, Magic Wand, or an AI auto-select feature, whatever your tool offers. Trace carefully around whoever or whatever you’re keeping.
- Remove the old background. Delete or mask out everything else, leaving your subject floating on a transparent layer.
- Clean up the edges. Zoom in. Fix the rough spots, especially around hair or fine details — this step alone separates a decent edit from an obvious one.
- Add the new background. Drop in your chosen image or color on a layer sitting behind the subject.
- Match the lighting. Adjust brightness and contrast, and don’t skip a soft shadow underneath — without it, your subject looks pasted on like a sticker.
- Blend the colors. A little color balance or hue adjustment so the subject’s tones don’t clash with the new scene.
- Export and save. PNG if you need transparency, JPG once everything’s flattened and final.
Tips for a Natural Look
Nailing the steps above gets you most of the way there. A few extra touches close the gap between “edited” and “obviously edited”:
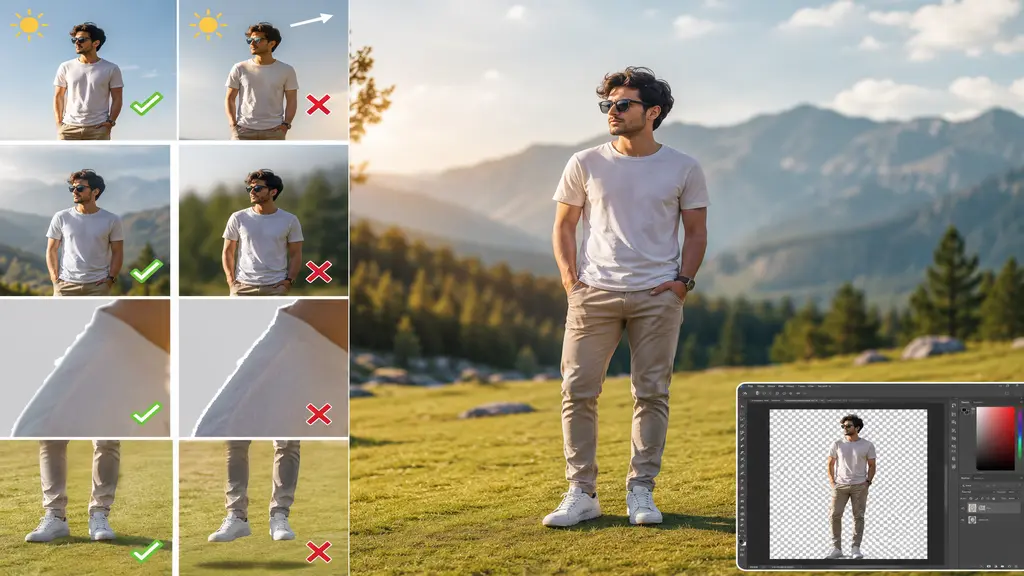
- Match the light direction. If your new background has sun coming from the left, your subject’s shadow should fall the same way — not the other way around.
- Keep resolution consistent. A sharp subject on a blurry background (or vice versa) is one of the fastest ways to give away an edit.
- Don’t oversharpen edges. A slightly soft edge blends better than one that looks cut with scissors.
- Add a subtle shadow. Even a faint one under the feet or base grounds the subject instead of leaving it floating.
Editing for Different Photos
The right approach really depends on what the photo’s actually for.
- Portraits and headshots usually want something soft or blurred behind them so the face stays the focus — busy scenes pull attention away.
- Product photos almost always call for plain white or transparent, since that’s what most marketplaces require anyway.
- Group photos are harder than they look, since you’re cutting out several subjects at once, each with their own edges and lighting.
- ID and passport photos leave little room for creativity — background color and sizing follow strict rules.
- Creative edits are where you get to have fun — beaches, skylines, whatever scene you can dream up.
Best File Formats
The format matters more than people think. Quick rundown:
- PNG — go-to for transparency, no quality loss.
- JPG — fine once the background’s already added and the image is flattened, but no transparency support.
- TIFF — common in print work since it holds detail better and doesn’t compress as hard.
- WebP — smaller file sizes, good for websites, quality holds up reasonably well.
If you’re unsure, just export as PNG first. You can always convert down to JPG or WebP later — going the other way isn’t really possible once a JPG’s flattened.
Common Mistakes
Even good tools won’t save you from a few classic errors:
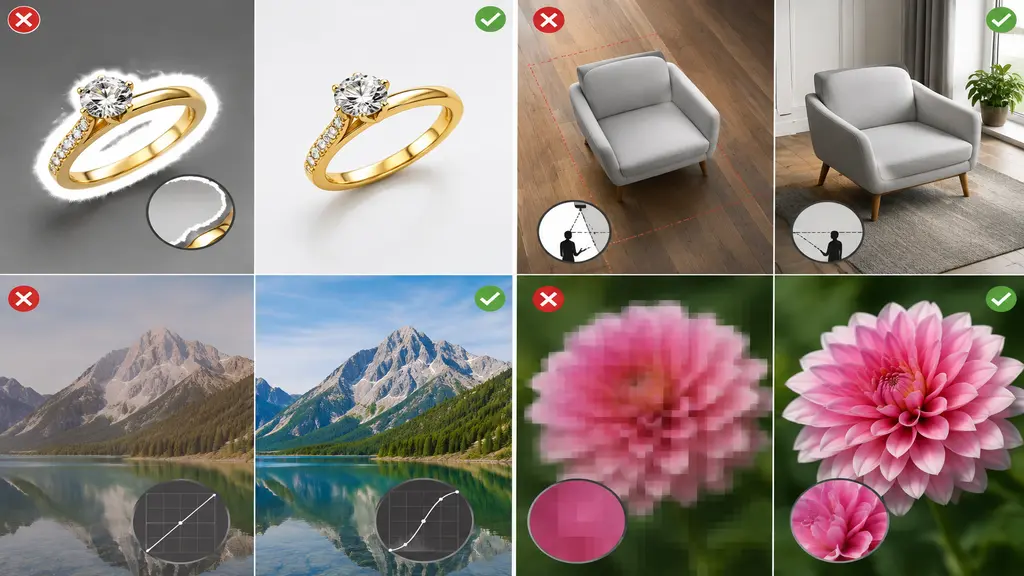
- Leaving a visible halo around the subject from a rushed selection.
- Ignoring perspective — placing an eye-level subject onto a background shot from above.
- Skipping color correction, which leaves everything looking flat or mismatched.
- Using low-res background images that blur or pixelate the moment you zoom in.
How Long It Takes
Depends entirely on the photo and the method. A simple AI edit on a plain, well-lit photo takes under a minute — upload, wait, download. A manual edit on something complicated, sheer fabric or a piece of jewelry with a hundred tiny gaps, can take a skilled editor anywhere from 10 minutes to well over an hour.
That gap matters more once you’re editing for business. One portrait? No big deal to do it yourself over coffee. Two hundred product photos that all need the same treatment? That’s not an evening project anymore, that’s days of repetitive work, and it adds up fast.
Editing Product Photos
If you run an online store, this stops being optional pretty quickly. Amazon, eBay, Etsy — most marketplaces demand plain white or transparent backgrounds, full stop. Doing that by hand across dozens or hundreds of listings eats your whole week, especially when you’re also handling inventory, orders, and the usual customer questions.
This is usually the point where sellers start looking outward instead of grinding through it themselves. If you’d rather skip that entirely, Clipping Creation India’s background removal service handles this at scale — consistent, marketplace-ready backgrounds across your whole catalog, no layer masks required on your end.

When to Hire a Pro
DIY editing is fine for the occasional photo. But there’s a point where it stops making sense to do it yourself:
- You’re editing large batches of product or catalog photos on a regular basis.
- Your images involve fine detail — hair, fur, glass, jewelry — that’s genuinely hard to cut out cleanly.
- You need everything to look consistent across dozens or hundreds of photos.
- You just don’t have the hours to learn this properly, let alone do it well every week.
At that point, handing it to an experienced editing team usually saves more time than it costs.
Keeping Quality Consistent
Once you’re editing more than a handful of photos, consistency starts mattering as much as individual quality. Nobody wants a customer noticing that photo twelve has a slightly different white balance than photo thirteen.
A few habits help. Shoot everything under the same lighting setup so you’re not fighting mismatched shadows afterward. Keep background color, size, and resolution identical across the whole batch. And if more than one person is editing the same set, agree on tools and settings up front — small inconsistencies pile up fast across a big catalog, and people notice more than you’d expect.
This is also usually where small business owners realize DIY has its limits. Editing five photos carefully by hand is one thing. Holding that same bar across five hundred, week after week, on top of everything else running a store involves — that’s a different job entirely.
Conclusion
Learning how to edit a background into a picture really isn’t as complicated as it sounds. The core process stays the same whether you’re using a free phone app or full Photoshop: select the subject, remove what’s behind it, add something new, blend it all together so it doesn’t look stitched on. For a photo here and there, doing it yourself is quick and honestly kind of satisfying once you get the hang of it. But if you’re staring down a catalog full of product shots that all need the same polish, handing it off to people who do this daily will save you hours you’d rather spend running the rest of your business.
