cci logo

Clipping Creations India: Clipping Path Service Provider

  • Home
  • Clipping Path Services
    • Clipping Path Service
    • Multiple Clipping Path Service
    • Background Remove Service
    • Ghost Mannequin Service
    • Car Photo Editing Service
    • Product Photo Editing Service
    • Image Masking Service
    • Drop Shadow Service
    • Color Correction Service
    • Photo Retouching Service
    • Vector Conversion Service
    • Photo Editing Service
  • Blog
  • Pricing
  • Our Portfolio
  • Free Trial
Home  »  Photo Editing • Tutorial   »   How to Fix Grainy Photos: Simple Editing Guide

How to Fix Grainy Photos: Simple Editing Guide

  • Paul Jones
  • August 22, 2026
  •  
    • Photo Editing
    • Tutorial
  • Tags: fix blurry photos, grainy photos, image quality, photo editing tips, photo noise reduction

Grainy feature image

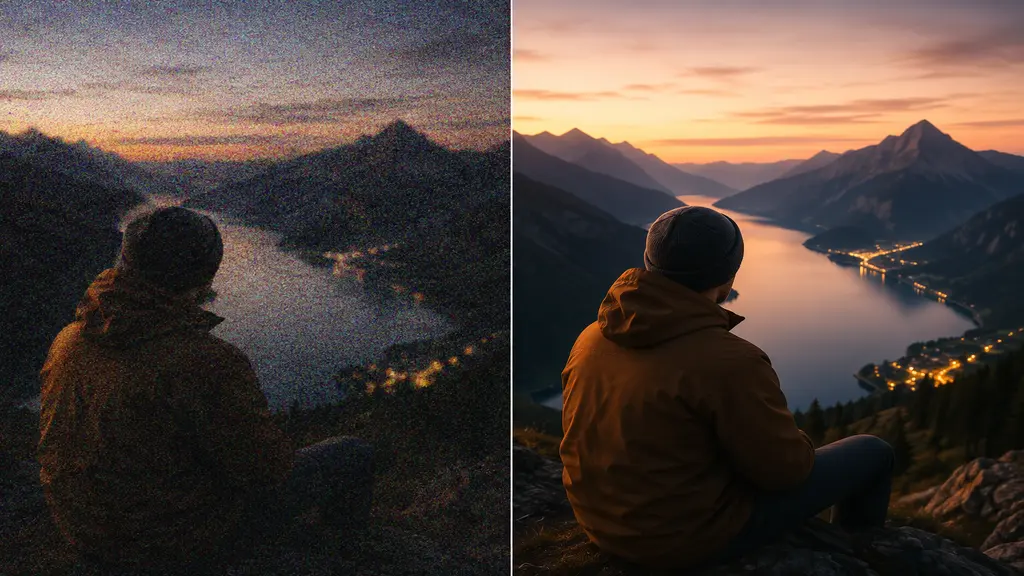
Open a photo on a bigger screen and suddenly there’s this rough, dotted texture crawling across it. Didn’t notice it on the phone. Now it’s all you can see. That’s grain, and if you’re searching how to fix grainy photos right now, here’s the short version: it looks worse than it actually is to fix. A dark room, ISO turned up too far, an older camera sensor struggling to keep up, that’s usually the whole story behind it.

Here’s what’s actually causing it, what removes it, and what to change next time you’re shooting so it doesn’t keep happening.

What Is Photo Grain?

It’s a rough, speckled texture. Shows up mostly in flat areas, a sky, a wall, someone’s forehead in a close portrait. Wherever the color is supposed to sit smooth, that’s where grain gives itself away first. The sensor is straining for light it doesn’t have enough of, and grain is basically what gets left behind from that effort. Search how to fix grainy photos after an indoor wedding or a dim dinner photo, and you’ll find you’re far from the only one dealing with it.

Two things cause most of it:

  • ISO pushed up in a dark room, which brings more light but drags noise in right along with it.
  • Not enough available light to begin with, so the sensor compensates on its own and grain is what’s left over.

Grainy vs Blurry Photos

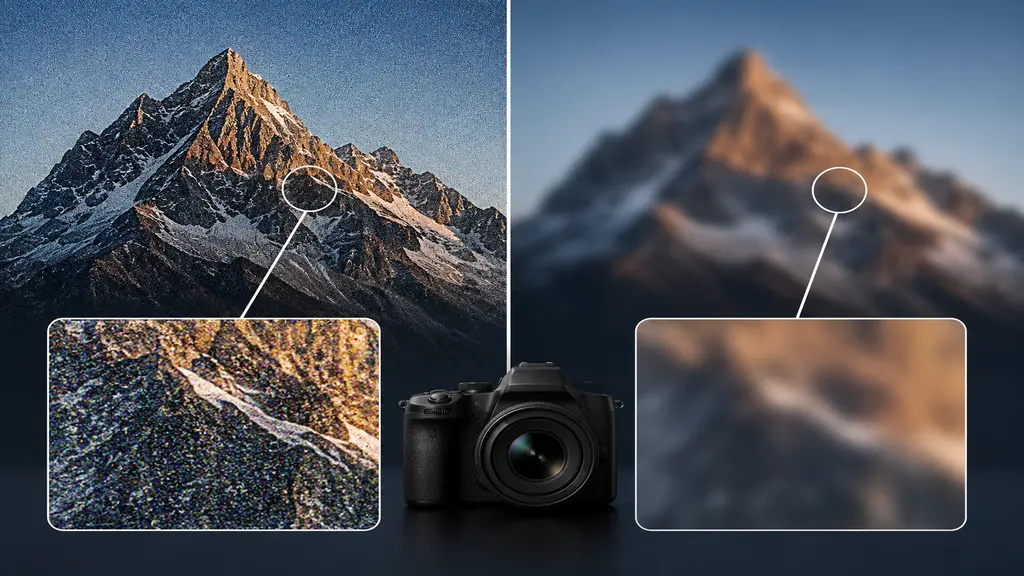
Quick thing to sort out first. People say “blurry” and mean “grainy” all the time, and the two aren’t fixed the same way at all.

What to CheckGrainy PhotoBlurry Photo
How It LooksCovered in tiny dots or specksEdges look smudged or soft
Main CauseHigh ISO or low lightCamera shake or wrong focus
SharpnessPhoto stays sharp underneathPhoto is not sharp at all
When It HappensDark rooms or night shotsMoving hands or moving subject
How to FixNoise reduction toolsBetter focus or a steady hand

Get this wrong and you’ll grab the wrong fix. Noise tools won’t touch blur. Sharpening won’t touch grain. Mix them up and the photo can end up looking worse than before.

Fix Grainy Photos in Photoshop

Photoshop still does this well, as long as you don’t push the sliders too far.

  • Open Camera Raw Filter under the Filter menu, then find the Detail panel where the noise controls live.
  • Raise Luminance gradually until the grain smooths out, stopping before edges start going soft.
  • Try Color Noise too, since it handles the colored specks hiding in shadows.
  • Sharpen a touch afterward, because noise reduction almost always leaves things a bit flat.
  • Zoom to 100 percent and actually look. Things that look fine zoomed out can fall apart at full size.

Works well for portraits and product shots, basically anywhere detail can’t be sacrificed.

Fix Grainy Photos Without Photoshop

Fix Grainy Photos Without Photoshop

Don’t have it? Most people don’t.

  • Free online denoising tools, upload a photo and a cleaner version comes back within seconds.
  • Phone apps that bury a noise slider under clarity or detail settings, worth digging for.
  • Lightroom mobile, free, with its own noise slider built right in.
  • AI enhancers that spot grain automatically and smooth it out in one tap.

Fine for casual, everyday photos. For product images meant for a store though, professional editing keeps a whole batch looking the same, and that consistency matters a lot more once you’re past a handful of photos.

Camera Settings to Stop Grain

Stopping grain before you shoot saves editing time down the line.

  • Keep ISO low, only raising it when the lighting truly leaves no choice, since that’s the main driver of grain.
  • Widen the aperture so more light comes in naturally, without ISO carrying the whole load.
  • Add extra light where you can, even a small lamp takes real pressure off the sensor.
  • Bring a tripod so the shutter can stay open longer without blur, letting ISO drop even further.
Why Clean Photos Matter Online

Why Clean Photos Matter Online

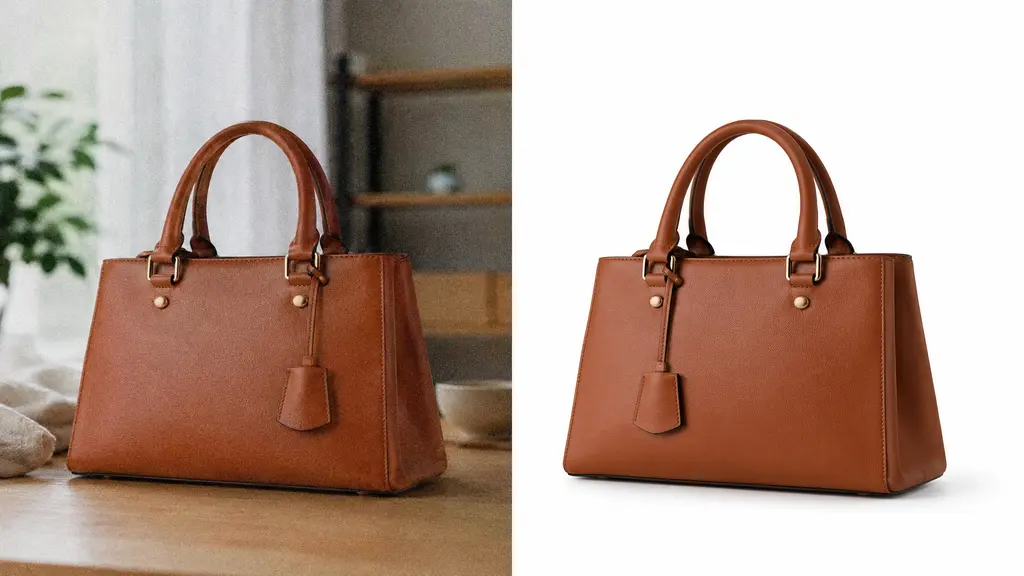
A grainy photo works against a good product without anyone quite realizing why. Shoppers can’t hold the item, so the photo has to do all the convincing by itself, and noise chips away at that trust fast. Clarity, lighting, sharpness, none of it works in isolation.

If the photos already have noise on top of a messy background, fixing grain alone only gets you halfway. That’s the gap our background removal service fills, cleaning up the backdrop so the photo genuinely looks ready for a store listing.

When to Hire a Photo Editor

DIY tools work fine for one photo or a quick social post. Bulk catalogs or client work usually need someone who handles this every day. A professional editor brings:

  • Consistency across a full batch, so photos match in tone instead of looking edited separately.
  • A better sense of where to stop, so noise reduction doesn’t tip into looking fake.
  • Background cleanup bundled with the grain fix, one finished photo instead of two jobs stitched together.

Try matching that consistency alone across dozens of product photos, and it gets old fast.

Conclusion

Grainy photos are annoying, not permanent. Photoshop, a free tool online, or just adjusting camera settings ahead of time, any of these bring a rough photo back to something usable. Once how to fix grainy photos stops feeling confusing, pairing that fix with clean background editing gets the image genuinely ready for wherever it’s headed next.

FAQ

Frequently Asked Questions

FAQ's
What causes photos to become grainy?

Mostly high ISO paired with low light, since the sensor boosts sensitivity to compensate and that shows up as noise.

Can grainy photos be fully fixed?

Usually, yes, though very heavy grain can still cost a bit of fine detail during the fix.

Does fixing noise make a photo look soft?

A little, which is why a light sharpening pass afterward usually helps.

Should grain be fixed in-camera or during editing?

Camera settings give the better result overall, but editing tools work fine as a backup.

  • Facebook
  • LinkedIn
  • WhatsApp

(Visited 3 times, 3 visits today)

Post navigation

< Previous
Next >

Leave a Reply Cancel reply

Your email address will not be published. Required fields are marked *

Top Services:

  • Clipping Path Service
  • Car Image Editing Service
  • Ghost Mannequin Service
  • Product Photo Editing Service
  • Multiple Clipping Path Service
  • Ghost Mannequin Service
  • Color Change Service
  • Drop Shadow Service
  • Color Change Service
  • Photo Editing Service
  • Image Masking Service

Popular posts:

  • How to Create See-Through Clothes in Photoshop: Easy…Photoshop see-through clothing effect guide
  • How to Move Eyes in Photoshop and Online ToolsHow to Move Eyes in Photoshop and Online Tools
  • How to Clip in GIMP: Step-by-Step Guide to Clipping…Step-by-Step Guide to Clipping Mask & Image Editing
  • How to Reverse Video in Photoshop: Photoshop GuideHow to Reverse Video in Photoshop Photoshop Guide
  • How to Export Photoshop ActionsHow to Export Photoshop Actions
  • How to Create an Alpha Channel in Photoshop?How to Create an Alpha Channel
  • How To Fix A Lazy Eye In PhotoshopHow To Fix A Lazy Eye In Photoshop
  • How to Fix a Dark Polaroid Picture? Easy Solution to…How to Fix a Dark Polaroid Picture
  • Guide to Using Blood Brushes for Photoshop:…Guide to Using Blood Brushes for Photoshop Everything You Need to Know
  • 10 Professional Photo Manipulation Artists You Must Follow10 Professional Photo Manipulation Artists You Must Follow

Recent Post

  • How to Remove a Person from a Photo: A Simple Guide That Actually Works
  • How to Make an Image Higher Resolution: 8 Easy Methods
  • How to Fix Grainy Photos: Simple Editing Guide
  • How to Make a Photo Less Blurry?
  • How to Fix Pixelated Photos: A Simple Guide to Clearer Images

Categories

  • Background Removal
  • Car Photo Editing
  • Clipping Path
  • Color Correction
  • Ghost Mannequin
  • Image Masking
  • Photo Editing
  • Photo Editing Services
  • Photo Retouching
  • Product Photo Editing
  • Tutorial
  • Vector Editing

About CCI

Clipping Creations India is a brand operated by Arafin Media. Here, every pixel tells a story. We offer our unparalleled service and invest our most talented minds at your solution whether you are a photographer or an agency. We are the gateway to exceptional photo editing services!

Get Your Quote

Quick Menu

  • About Us
  • Contact Us
  • Blog
  • Terms and Conditions
  • Privacy & Policy

Payment Method

  • PayPal
  • Stripe
  • Western Union
  • Skrill
  • Payoneer
  • Wise

Get In Touch

+8801715-491890

hello@clippingcreationsindia.com

Canada Office: 1401-2900 Carling Ave. Ottawa, ON, K2B 7J6

Bangladesh Office: 15 Bijoy Nagar, Abdur Rouf Tower (6th Floor), Dhaka – 1000, Bangladesh

Copyright © 2012 - 2026 Clipping Creations India | All rights reserved.

  • facebook
  • twitter
  • instagram
  • pinterest
  • linkedin

Live Chat